


SSH Tunnelling
SSH, the Secure Shell, is a standard protocol that encrypts communications between your computer and a server. The encryption prevents these communications from being viewed or modified by network operators. SSH can be used for a wide variety of secure communications applications, where secure log-in to a server and secure file transfers (scp or SFTP) are the most common.
SSH is especially useful for censorship circumvention because it can provide encrypted tunnels and work as a generic proxy client. Censors may be reluctant to block SSH entirely because it is used for many purposes other than circumventing censorship; for example, it is used by system administrators to administer their servers over the Internet.
Using SSH requires an account on a server machine, generally a Unix or Linux server. For censorship circumvention, this server needs to have unrestricted Internet access and, ideally, is operated by a trusted contact. Some companies also sell accounts on their servers, and many Web hosting plans provide SSH access. There is a list of shell account providers at:
http://www.google.com/Top/Computers/Internet/Access_Providers/Unix_Shell_Providers which sell accounts for about 2-10 US dollars a month.
An SSH program called OpenSSH is already installed on most Unix, Linux, and Mac OS computers as a command-line program run from a terminal as "ssh". For Windows, you can also get a free SSH implementation called PuTTY.
All recent versions of SSH support creating a SOCKS proxy that allows a Web browser and a wide variety of other software to use the encrypted SSH connection to communicate with the unfiltered Internet. In this example, we will describe only this use of SSH. The steps below will set up a SOCKS proxy on local port 1080 of your computer.
Linux/Unix and MacOS command line (with OpenSSH)
OpenSSH is available from http://www.openssh.com/, but it comes pre-installed on Linux/Unix and Mac OS computers.
The ssh command you'll run contains a local port number (typically 1080), a server name, and a username (account name). It looks like this:
ssh -D localportnumber accountname@servername
For example:

You'll be prompted for your password and then you'll be logged into the server. With the use of the -D option, a local SOCKS proxy will be created and will exist as long as you're connected to the server. Important: you should now verify the host key and configure your applications, otherwise you are not using the tunnel you have created!
Windows graphical user interface (with PuTTY)
PuTTY is available from :
http://www.chiark.greenend.org.uk/~sgtatham/putty/download.html.
You can save the putty.exe program on your hard drive for future use, or run it directly from the Web site (often, this is possible on a shared or public-access computer, such as a computer in a library or Internet café).
When you start PuTTY, a session configuration dialog appears. First enter the host name (address) of the SSH server you are going to connect to (here, example.com). If you only know the IP address or if DNS blocking is preventing you from using the host name, you can use the IP address instead. If you will perform these steps frequently, you can create a PuTTY profile that saves these options as well as the options described below so they will be used every time.

Next, in the Category list, select Connection > SSH > Tunnels.
Enter 1080 for the Source port, and check the Dynamic and IPv4 boxes.

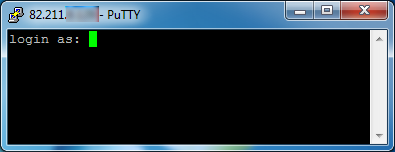
Now click Add, and then Open. A connection is established to the server, and a new window opens, prompting you for your username and password.
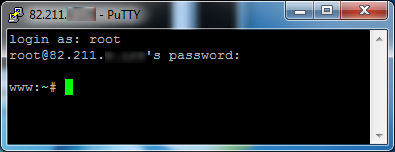
Enter this information and you will be logged into the server and receive a command line prompt from the server. The SOCKS proxy is then established. Important: you should now verify the host key and configure your applications, otherwise you are not using the tunnel you have created.
Host key verification
The first time you connect to a server, you should be prompted to confirm the host key fingerprint for that server. The host key fingerprint is a long sequence of letters and numbers (hexadecimal) like 57:ff:c9:60:10:17:67:bc:5c:00:85:37:20:95:36:dd that securely identifies a particular server. Checking the host key fingerprint is a security measure to confirm that you are communicating with the server you think you are, and that the encrypted connection cannot be intercepted.
SSH does not provide a means of verifying this automatically. To get the benefit of this security mechanism, you should try to check the value of the host key fingerprint with the administrator of the server you're using, or ask a trusted contact to try connecting to the same server to see if they see the same fingerprint.
Verifying host key fingerprints is important for ensuring that SSH protects the privacy of your communications against eavesdropping, but it isn't necessary if you only want to circumvent censorship and don't care if network operators can see the contents of your communications.
Configuring applications to use the proxy
The proxy created by the steps above should work until you close the SSH program. However, if your connection to the server is interrupted, you will need to repeat the same steps to reactivate the proxy.
Once the proxy is up and running, you need to configure software applications to use it. Using the steps above, the proxy will be a SOCKS proxy located on localhost, port 1080 (also known as 127.0.0.1, port 1080). You should try to ensure that your applications are configured in a way that prevents DNS leaks, which could make SSH less effective both for privacy protection and censorship circumvention.
More options
So far, all these commands display a command line on the remote machine from which you can then execute whatever commands that machine provides to you. Sometimes you may want to execute a single command on a remote machine, returning afterward to the command line on your local machine. This can be achieved by placing the command to be executed by the remote machine in single quotes.
$ ssh remoteusername@othermachine.domain.org 'mkdir /home/myname/newdir'
Sometimes what you need is to execute time consuming commands on a remote machine, but you aren't sure to have sufficient time during your current ssh session. If you close the remote connection before a command execution has been completed, that command will be aborted. To avoid losing your work, you may start via ssh a remote screen session and then detach it and reconnect to it whenever you want. To detach a remote screen session, simply close the ssh connection: a detached screen session will remain running on the remote machine.
ssh offers many other options. You can also set up your favorite systems to allow you to log in or run commands without specifying your password each time. The setup is complicated but can save you a lot of typing; try doing some Web searches for "ssh-keygen", "ssh-add", and "authorized_keys".
scp: file copying
The SSH protocol extends beyond the basic ssh command. A particularly useful command based on the SSH protocol is scp, the secure copy command. The following example copies a file from the current directory on your local machine to the directory /home/me/stuff on a remote machine.
$ scp myprog.py me@othermachine.domain.org:/home/me/stuff
Be warned that the command will overwrite any file that's already present with the name /home/me/stuff/myprog.py. (Or you'll get an error message if there's a file of that name and you don't have the privilege to overwrite it.) If /home/me is your home directory, the target directory can be abbreviated.
$ scp myprog.py me@othermachine.domain.org:stuff
You can just as easily copy in the other direction: from the remote machine to your local one.
$ scp me@othermachine.domain.org:docs/interview.txt yesterday-interview.txt
The file on the remote machine is interview.txt in the docs subdirectory of your home directory. The file will be copied to yesterday-interview.txt in the home directory of your local system
scp can be used to copy a file from one remote machine to another.
$ scp user1@host1:file1 user2@host2:otherdir
To recursively copy all of the files and subdirectories in a directory, use the -r option.
$ scp -r user1@host1:dir1 user2@host2:dir2
See the scp man page for more options.
rsync: automated bulk transfers and backups
rsync is a very useful command that keeps a remote directory in sync with a local directory. We mention it here because it's a useful command-line way to do networking, like ssh, and because the SSH protocol is recommended as the underlying transmission for rsync.
The following is a simple and useful example. It copies files from your local /home/myname/docs directory to a directory named backup/ in your home directory on the system quantum.example.edu. rsync actually minimizes the amount of copying necessary through various sophisticated checks.
$ rsync -e ssh -a /home/myname/docs me@quantum.example.edu:backup/
The -e option to ssh uses the SSH protocol underneath for transmission, as recommended. The -a option (which stands for "archive") copies everything within the specified directory. If you want to delete the files on the local system as they're copied, include a --delete option.
Making life easier when you use SSH often
If you use SSH to connect to a lot of different servers, you will often make mistakes by mistyping usernames or even host names (imagine trying to remember 20 different username/host combinations). Thankfully, SSH offers a simple method to manage session information through a configuration file.
The configuration file is hidden in your home directory under the directory .ssh (the full path would be something like /home/jsmith/.ssh/config – if this file does not exist you can create it). Use your favorite editor to open this file and specify hosts like this:
Host dev
HostName example.com
User fc
You can set up multiple hosts like this in your configuration file, and after you have saved it, connect to the host you called "dev" by running the following command:
$ ssh dev
Remember, the more often you use these commands the more time you save.