Case Studies
The following case studies should give you some background information and ideas about how Etherpad can be used.
Case Study: P2PU.org Community calls
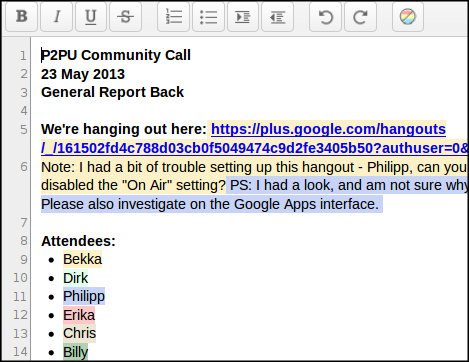
Etherpad is used as a tool for the Peer to Peer University community for their "community calls" and on-going planning. Invitations with a link to the pad are circulated. While other tools are used the pad is the key tool. A link to a Google HangOut (an online chat tool), links to additional pads detailing past meetings and projects.
Using Etherpad helps to removes the barriers to entry. Anyone can click on the link and start editing. For this community there are conventions to the use of the pad. One of those conventions is to make it clear to see who is editing what part of the pad, new users sign in as attendees. This will link their names to whatever they write.
The pad is used in combination with voice and text chat. Sometimes the talk will go quiet and people will concentrate on adding information to the Etherpad adding it form memory, cutting and pasting text from from different sources or linking out to more in depth information. The weekly meeting process encourages the disparate team to pool information to have it visible in one space. The real time element focuses attention on the task and ensures that there isn't a project drift in terms of not finishing the work in time.
Case Study: Pads for use in activism
Etherpads have been used by many activist communities. Often these pads are not secure in the sense that they are password protected but they do offer the possibility of anonymous collaboration. Two commonly used pads are pad.riseup.net and piratepad.net. Pads have been used for a wide variety of causes from Anonymous to co-ordinate hacktivism 1 to groups in Spain for civic action. 2
Unlike a tool like Google Docs where users need to log in to collaborate, this is not needed for Etherpads. While most large scale services log information like the IP address (identifying addresses) of connecting users, it is possible to configure an Etherpad server not to keep any record of the users who connect to it. However, removal of logs in this way and the lack of user log-ins make these pads practically anonymous.
There is more written on the security elements of Etherpads later in this guide.
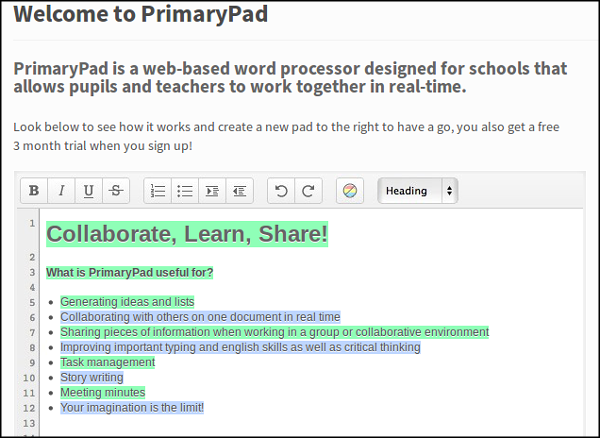
Case Study: Primary Pad
Primary Pad is an installation of Etherpad set up by a teacher who saw the value of pads for school-based educators. It is based at the website http://primarypad.com. The list of potential uses listed on the Primary pad include:
- Generating ideas and lists
- Collaborating with others on one document in real time
- Sharing pieces of information when working in a group or collaborative environment
- Improving important typing and written skills as well as critical thinking
- Task management
- Story writing
The site contains links to other resources which outline ideas 3 for how Etherpad can be used in the class room. 4
- http://www.theatlantic.com/technology/archive/2010/12/what-its-like-to-participate-in-anonymous-actions/67860/^
- http://arstechnica.com/tech-policy/2011/05/german-police-seize-pirate-party-servers-looking-at-anons-toolkit/^
- http://digitalclass.wordpress.com/2009/04/07/two-uses-of-etherpad-in-the-classroom-to-promote-higher-order-thinking-skills/ ^
- http://ideastoinspire.co.uk/presentations/primarypad.htm?iframe=true&width=720&height=579^
Etherpad, Security and Privacy
Etherpad is a tool for public collaboration. By default all pads are open to general users of the Internet. As such, it is not advisable to use this tool for information that you do not want to be in the public domain.
However, it is possible to install Etherpad so little information can be gathered which can be used to incriminate users. There are limits to this level of anonymity. It may be possible to check that you have connected to a website even if the contents of what you have read or written can not be detected. This chapter deals with these aspects and suggests different tools which may be useful to you.
User level security
Using Etherpad with HTTPS / SSL
It is possible to connect to Etherpad to using HTTPS connections. There is more information on HTTPS (also called SSL) in other guides like the FIrefox Manual. Very briefly, HTTPS connections encrypt the data between your computer and the website you are connecting to.
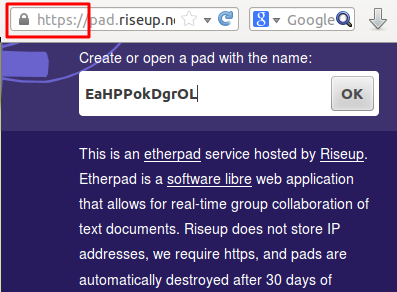
If this kind of digital 'eavesdropping' is a concern for you then choose an Etherpad where HTTPS is available. In the Firefox browser, you can tell you are connected via HTTPS in the location bar. If you are connected, you will see https:// and a image of a lock.
You can also investigate using other security and bypassing censorship techniques. Details of these tools can be found in similar guides on Bypassing Censorship and the Firefox browser.
Administrator level security
IP address logging and automatically deleting unused pads
IP addresses are numbers which can identify you when you browse the Internet. When authorities track Internet use or take possession of Internet servers as part of investigations, it is often these IP addresses which are used to incriminate Internet users.
It is possible to set up a server so that it does not make a record of IP addresses. One way of doing this if you are using an Apache webserver is to use the remove_ip module. 1
Rather than leaving data hanging around on the Internet you may choose to use an Etherpad service that deletes data after a certain amount of time if it is not being used. This is true of the service at pad.riseup.net which deletes pads after 30 days of inactivity.
Password Protecting Etherpads
It is possible to place a password on Etherpad when it is installed. This may be something you could ask an Internet administrator to do for your project. If you have technical skills you can find out how to do this in the section on Installing Etherpad.

If you do use an Etherpad with password protection, it is important to always use HTTPS to connect to it. Otherwise your password will be sent in an unencrypted way.
Other types of good practices
Do you know what you are doing?
As with many aspects of Internet security, for very sensitive information it is best not to publish it to a webserver on the Internet at all. Before running a service and declaring it to be a secure tool you should ensure you have good depth of knowledge on your subject.
Choosing the right tool for the job
If you choose not to use Etherpad as you collaboration tool then there are other services and software that may be useful to you.
Crabgrass
Crabgrass is web software and a service provided at http://we.riseup.net. It is a tool used by many grass roots activists.
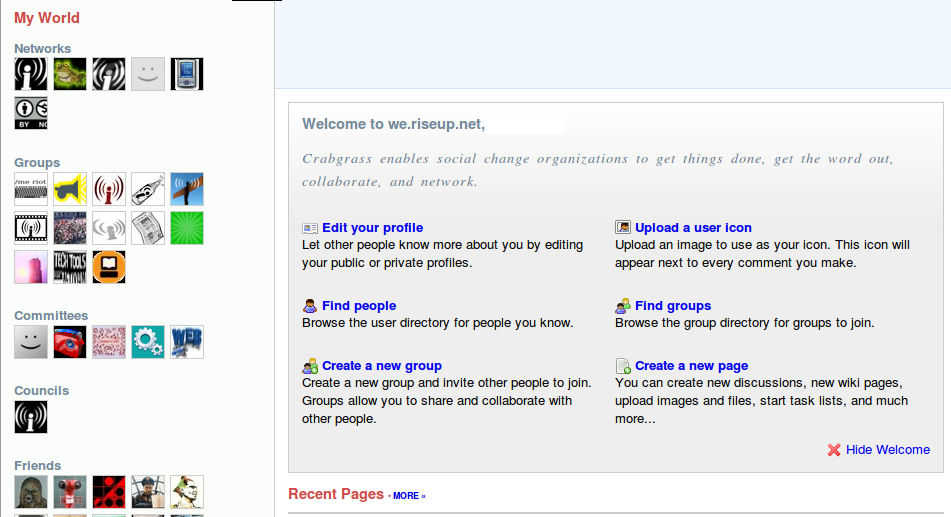
It provides a secure space to collaborate with your friends and colleagues by allowing you to create different spaces and use tools for collaborative writing, organising and decision making.
OwnCloud
OwnCloud is Free Software that provides an online storage area for data (cloud storage) for you. Versions until 4.5 featured the ability to encrypt your files.
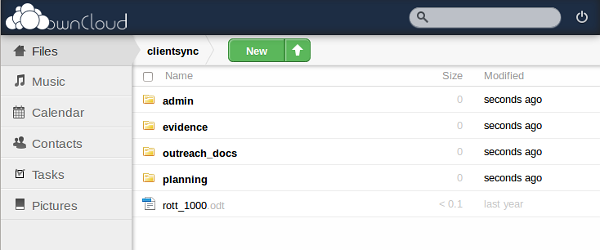
The system is mainly designed for the sharing of existing files but there are also simple tools for editing documents and it is possible to integrate Etherpad. There is also the ability to use shared calendars. You can download or find out more about OwnCloud at http://owncloud.org/.
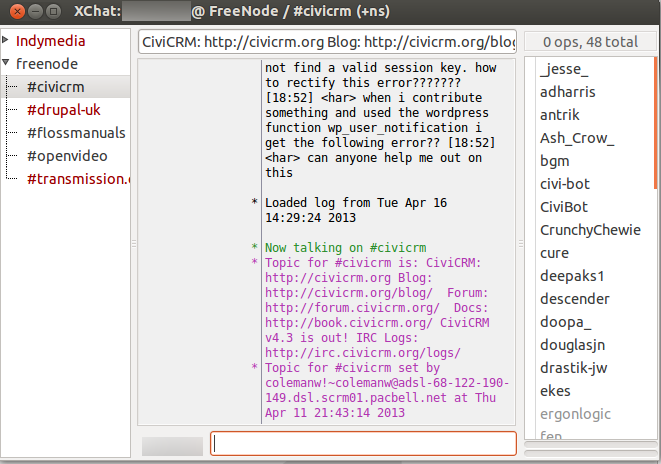
IRC
IRC (Internet Relay Chat) is a well tested way of chatting in real time with many people. It is possible to keep a log of your chats and have encrypted chats making it a good tool for quick collaboration on texts.
There is more information about IRC and the different clients you can use here. 2
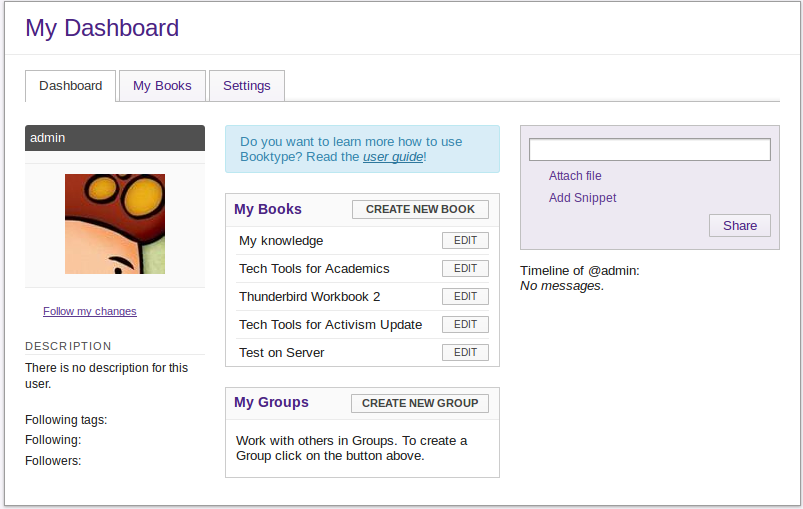
Booktype
Booktype is a more advanced tool for collaborative writing, It has a focus on producing printed books or booklets. As such, there are many options for laying out images and text.
It is possible to hide books from general users however Booktype has not been designed as a secure space for sensitive documents. You can try out, download or find out more information on Booktype at http://www.sourcefabric.org/en/booktype/
Wikis
Although most wikis are not designed to be private or encrypted, they can be password protected.
There are good tools in most wikis for keeping a track on edits that have been made and reversing destructive changes. For formatting wikis use something called "wiki markup" which can make wikis more tricky to use that other tools in this guide. This is especially true if you want to add images to your documents.
If you are interested in trying a more secure wiki tool, which allows for encrypted use, you can try Wiki on a Stick. 3
Encrypted Email and Attachments
While there are many advantages to using online collaboration tools not many of them have been designed to be very secure. To avoid this problem you may want to use more tried and tested ways of communicating securely. For example, it is possible encrypt emails using a technology called GPG.

There is a manual on Encrypting Email 4 with GPG and the cross platform email client Thunderbird.
- https://we.riseup.net/debian/apache^
- https://techtoolsforactivism.org/content/instant-messaging^
- http://stickwiki.sourceforge.net^
- https://flossmanuals.net/thunderbird-workbook/^
Getting Started with Etherpad
When getting started with Etherpad you are likely to start in one of two ways. You may be the person who is initiating the writing. In this case you will want to chose an Etherpad service and create a new pad. Alternatively, you may be someone invited to contribute to an already existing pad.
How to get started
Create a pad
To create a pad, point your browser to a service which is running Etherpad. If you want to be independent then you may want to install Etherpad on your own server.
Some existing services at the time of writing are:
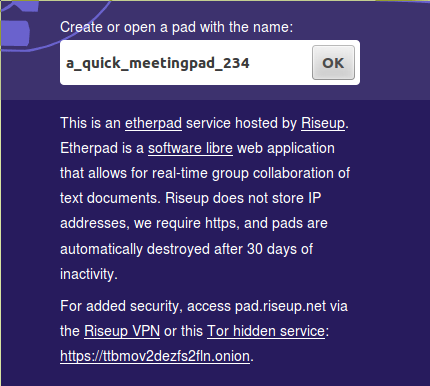
Once you land on these pages there are different ways of creating a pad. Some servers will give you an automatically generated pad name. Others allow you to enter your own name.

To invite others to collaborate with you on this pad you can click on the </> Icon to show options for sharing the pad.

In this case copy the link to share the pad.
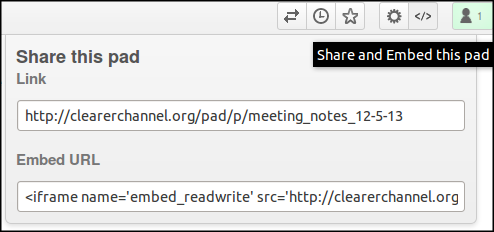
You can now send this link via email or and instant messaging service inviting other people to join you in the writing of the document you have just started.
Start work on an existing pad
To start work on an exiting pad you will normally be sent a link to the pad. This will normally happen via an email written by the person inviting you.
Often you will be able to click on the link being sent to you. If not you can copy it and paste it into the address bar of your web browser.
Single author writing in your pad
To start writing you can use the pad in the same way that you would a normal word processor or the writing window of an email editor.
If you have just created the pad yourself you will see some existing text already there. You can select this and delete it.
You can now type text into the editor.

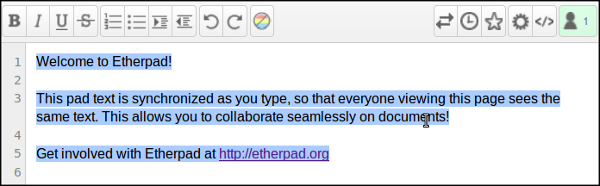
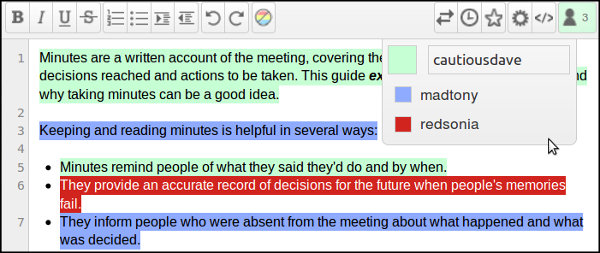
You can format the text using the provided buttons on above the text box.

These are in order: Bold, Italic, Underline, Strikethough, Numbered list, Unordered list, Indent, Outdent, Undo and Redo. Some of these formatting styles are show below.

As you type you may notice that there is a background color behind what you type.This color is called an Authorship Color. If other people start writing to the pad their text will show up as a different color. If you are only writing by yourself then this may be distracting and you can choose to remove these Authorship Colors by clicking on the multicolored icon.

Multiple author writing in your pad
As other people join the pad and start to type their text will appear in other colors. This allows you to keep track of who has written what.
To make this easier, it is a good idea for you to link our name with your color. To do this click on the icon of the head and shoulders at the top right of your page.
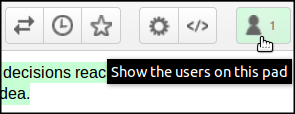
This will prompt you to enter your name.

Type in a name or a nickname or pseudonym and press Enter.

As more users start to edit the document they will appear in this list.This allows you to see who has written which text.
Interacting with other writers
One of the core reasons for using Etherpad is to be able to collaborate in real time with other writers remotely. Etherpad provides a Chat window which allows you to talk in real time with other writers.
To activate the chat on on a default installation, click on the chat icon .
If you type text in the small text field at the bottom this is now visible to the other people currently looking at the document.
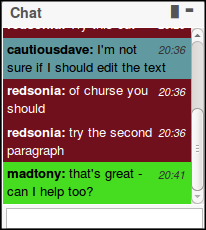
The chat tools is a great way of exchanging information about what you are writing or simply to greet others and make them feel welcome in the collaborative writing process.
It is possible to display chat more permanently. You can do this by clicking on the left of the two icons above the chat window.

Recording changes and revisions
One of the key features of Etherpad is that it keeps a record of all the changes that are made to the document.
To view these changes click on the icon that looks like a clock to show the time slider of the project.

There is a playing head slider which you can drag to the left to move between versions.The playing head starts at the right with the latest version of the pad.
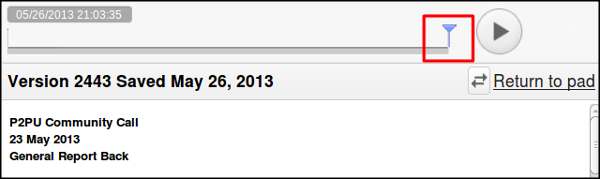
Dragging this playing head back to version 0 should show the default message and the time when the pad was created.
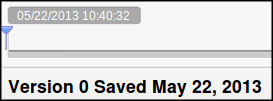
*When you drag the playing head you will see the text alter. This is a visual representation of the changes that have been made to the text.

It is possible to click on the play button to the right of this timeline screen to replay these changes at a speed where you can generally keep a track of what happened.
Practically, this is useful because you or a collaborator may have deleted some text by mistake which you might want to restore. It is also very interesting to see how your collaboration progresses. This is a great visualisation of collaborative creativity in action.
When you are finished you can click on the Return to the pad link.
Intentional Saved Revisions
While Etherpad saves all work and changes in small increments by default, you may want to set intentional versions or revisions. This is done by clicking on the star icon.
If you go to the Timeline view of a pad where these saved revisions have been used you will see the intentionally saved revisions as stars marked along the timeline.
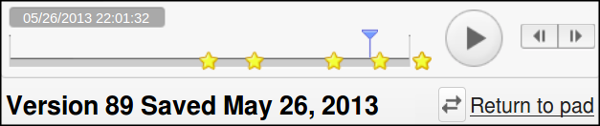
You can skip back to one of the 'starred', intentional versions by double clicking on it.
Importing and exporting documents
You may want to start a pad with a word processing document you have already created.When you have finished collaborating you may also want to export the document you have created.
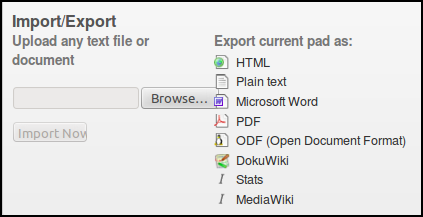
It is possible to do this in many different formats. To start click on the Icon with two arrows facing opposite directions in the tool bar on the top right.

You can choose to export to a number of different file types. These include HTML, Plain text, Microsoft Word, PDF, ODF (Open Document Format), DokuWiki and MediaWiki.
Installing Etherpad
This chapter will look at some of the issues surrounding installing Etherpad.
What are the pros and cons of installing your own installation of Etherpad?
Some of the questions you may want to ask yourself are:
- Is anonymity a high concern for your project?
- Is there an already existing service running that I can trust?
- What are the general privacy limitations of using an online services for sensitive information?
How to Install Etherpad
These notes are adapted from the installation notes here. 1
GNU/Linux and other UNIX-like systems
You'll need gzip, git, curl, libssl develop libraries, python and gcc.
For Debian/Ubuntu:
apt-get install gzip git-core curl python libssl-dev pkg-config build-essential
Additionally, you'll need node.js installed, Ideally the latest stable version, be careful of installing nodejs from apt.
As any user (we recommend creating a separate user called etherpad-lite):
Move to a folder where you want to install Etherpad Lite. Clone the git repository
git clone git://github.com/ether/etherpad-lite.git
Change into the new directory containing the cloned source code
cd etherpad-lite
Run
bin/run.sh
Now open http://127.0.0.1:9001 in your browser.
You can update to the latest version with
git pull origin
The next time you start Etherpad -
bin/run.sh
will update the dependencies. You can initially modify the settings in settings.json. Once you have access to your /admin section settings can be modified through the web browser. You should use a dedicated database such as "mysql", if you are planning on using etherpad-in a production environment.
Installing Abiword
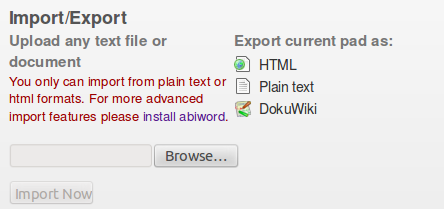
You should install Abiword if you want to importing and exporting word processing documents
This can be handy for many users. If you don't install it then you get a message prompting you to do so when you click on the Import / Export button.
Follow these instructions to install Abiword on your server.
https://github.com/ether/etherpad-lite/wiki/How-to-enable-importing-and-exporting-different-file-formats-in-Ubuntu-or-OpenSuse-or-SLES-with-AbiWord
When you have installed abiword you can configure Etherpad to use it by altering the file settings.json in a text editor. Find the line that says:
"abiword" : null,
and change it to:
"abiword" : "/usr/bin/abiword",
Password Protecting Etherpad/Installing Reverse Proxy
For better security and stability it is good practice to use a webserver as a reverse proxy for Ethepad. 2
This will allow you password protect your installation and to set the default connection to SSL / HTTPS. How this is set up will depend on what webserver you are running. If you are not familiar with these concepts then you will need to do research or ask a specialist to help you. There is more help on the Etherpad wiki on how to do it for Apache, ngnix and other webserver on the wiki pages of the project. 3
This will also allow you to have nice URLs for your pad, like "http://etherpad.example.com/padname".
Integrating Etherpad with other platforms
You may be in a position where it is an advantage to integrate Etherpad with other online web application like WordPress or Moodle. As we mentioned in the introduction to this guide, Etherpad is very popular with educators. There is a plug in to be able to include Etherpad in Moodle . 4
It is possible to restrict access to pads with existing usernames and passwords. Integration means users can log in using their existing usernames and this information can be used to create author information.
Contribute to Etherpad
Etherpad is an open source project. That means that everything, from this website to the core of the application itself, has been contributed by passionate, helpful individuals (such as yourself) who liked what they saw and wanted to make something even better. So if you like what you see, and want to make something even better, we'd like to see your contributions. It doesn't matter how familiar you are with real-time applications, or whether you know how to write programs for Node.js. There are plenty of ways to be helpful! Just ask!
One of the first things you should do is actually use Etherpad, and get to know it, read about it, be evangelical about it, and engage with the wider community. Learn how to write plugins or translate the user interface to your mother tongue. Be creative!
Helpful resources
The Etherpad wiki is a helpful resource for Tutorials and How-to's.
5
If you're new to node.js, which Etherpad is built on have a look at with Ryan Dahl's Introduction to Node.js. 6
- https://github.com/ether/etherpad-lite/blob/master/README.md^
- http://en.wikipedia.org/wiki/Reverse_proxy^
- https://github.com/ether/etherpad-lite/wiki/How-to-put-Etherpad-Lite-behind-a-reverse-Proxy ^
- https://moodle.org/plugins/view.php?plugin=mod_etherpad ^
- https://github.com/ether/etherpad-lite/wiki^
- http://youtu.be/jo_B4LTHi3I^
Taking Etherpad Further
The features described in this chapter may not be available in all versions of Etherpad as they may depend on your adding other plugins. We will be clear about which plugins are required. If you do not have admin access you can still find this chapter useful as you may be able to request the administrator to add some of the following plugins to the installed Etherpad version you are using.
Adding plugins to your installation
This requires you to to have an admin log in to your installation of Etherpad. If you have not set one up yet you can skip to the installation section. Point your web browser to the admin page of your Etherpad installation and log in. Add /admin/ to the end of the URL. eg http://yourpadsite.org/admin/
If you click on the Plugin Manager link at the side of you page you will see the following screen.
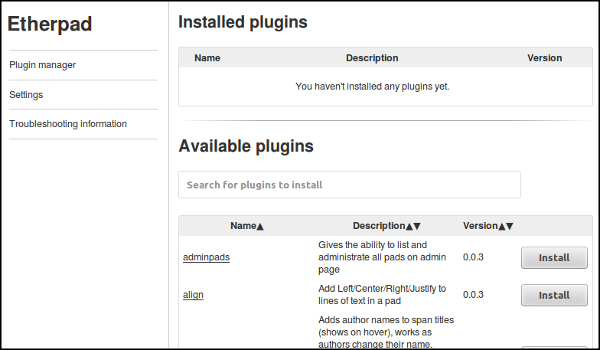
It may take a minute or two for the Available plugins section to update.
You can browse the descriptions of the plugins to see if they do something you want. To install a plugin click on the Install button.

After installing, the plugin should then be visible in the installed plugins section.
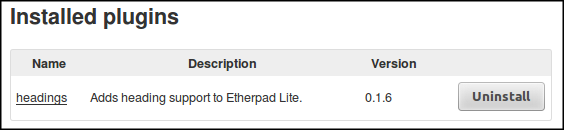
You can point your browser back to your Etherpad installation to see if the changes have taken place.
Many plugins are accessed from the Settings menu button.
Using Etherpad Settings
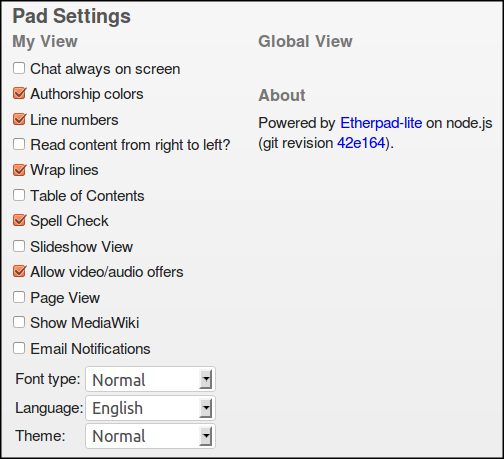
You can access other settings for Etherpad documents by clicking on the cog icon.

Depending on the installation of Etherpad you are using you will have different options available to you. This depends on how much extra functionality or plugins have been added to the basic installation.
You can see the simple Pad Settings of a newly installed Etherpad below.

If you go to a more advanced site like the one maintained at http://beta.etherpad.org, you can see that clicking on the setting icon gives you many more options.
You can find out more about these additional options in other parts of this guide including Taking Ethernet Further.
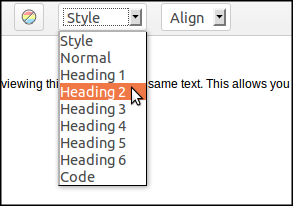
Adding Heading and Styles to your text
If you are used to organising your written text with headings then you may feel the lack of this ability on the most basic etherpad installations. Luckily there is a plugin which allows for this functionality.
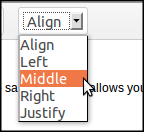
Align
Added the Align plug in adds a toolbar option to align your text to the left, right, center or justified.
Search for Pads
The adminpads plug in allows admins to see a list or to search for the different pads on an Etherpad installation.
After installing this plug in click on the new menu item called Manage Pads.
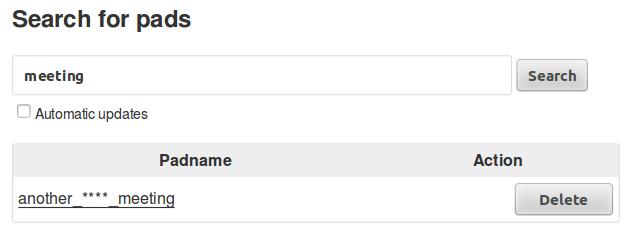 You can also delete pads easily using this plug in.
List of Pads
There is a similar plugin called List Pads which creates a list of pads on the home page of your installation.
These pads are listed by the first letter of your pad so it will always help to know what a pad is called if you are browsing for it.

Email Notifications
This is useful if you want to know if people are editing your pad. When the plug in is installed you can sign up to get email notifications on each pad by clicking on the Cog image to access the pad settings.
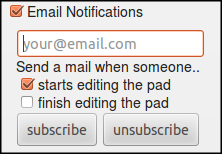
Put a tick in the Email Notifications box and you will see option appear to add your email and select an option to choose if you want to receive an email when someone starts editing or finishes editing the Pad.
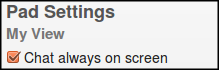
Chat Always on Screen
This option, when installed it allows users to always displays the chat to the right of the pad. This is useful if you always use this feature.