


Introduction to Video Effects
Once you have imported your raw materials and started creating new clips, you might want to use some Effects. Effects are subtle for the most-part, yet without them a video can be confusing, ugly or ineffective.
Effects can be used to control the pace of your video, structure your narrative and create the desired mood. These are important functions but the audience wont notice well placed effects at all. Effects should never distract the viewer from the content of a video.
Here is a quick guide to using a basic effect Fade to Black.
Hands On: Add a Fade to Black
Fade to Black. This is where the video image slowly darkens until the screen is totally black.
 You will have seen it used many times, though often without actively noticing it. This effect can be used for technical or narrative reasons. For example:
- by slowing down the pace of a video
- by indicating the passing of time
- in conjunction with a fade out of audio to end a video piece
- slow fade outs can add drama and suspense
- to hide jump cuts
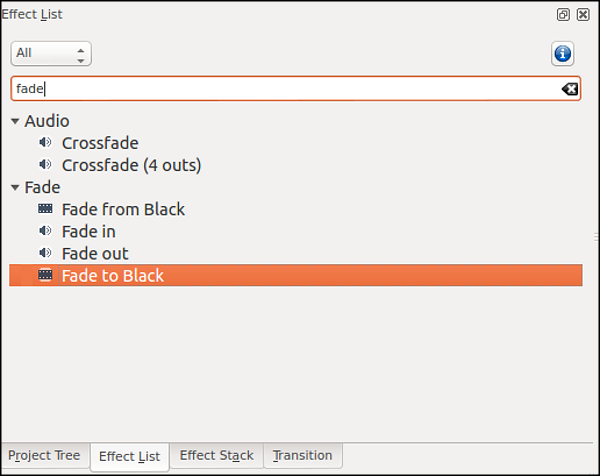
To add a Fade to Black to a video clip, search for “fade” in the Effects List and select Fade to Black.
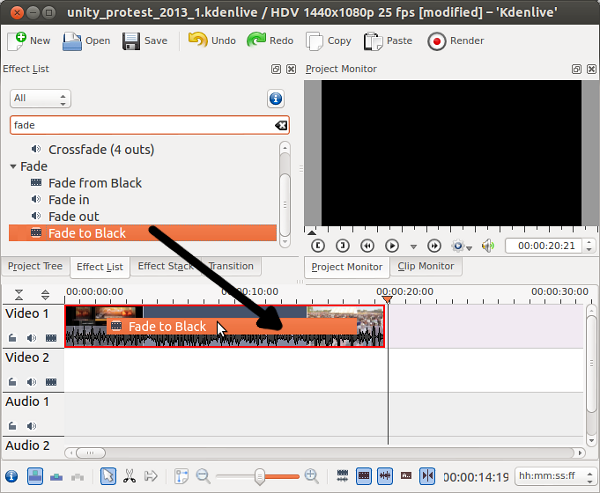
Drag the effect from your Effect List and drop it on top of the clip in your timeline.
You will now see that your Effect Stack window shows the Fade to Black effect
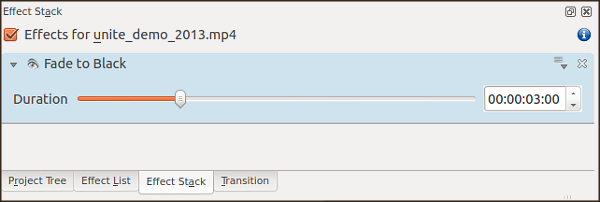
You can adjust the length of the fade (how many seconds before the end of the clip the fade starts) by moving the Duration slider in your Effect Stack.

Adjust the duration of your fade and review in the Project Monitor until you feel it looks right.
If your fade is too long, it will become very obvious, but if it's too short, it may look like a strange flash.
Fade From Black:
You can also create a fade from black at the start of your clip. To do this, the steps are the same as above, except you choose Fade from Black from the effects list rather than Fade to Black.