


Advanced Audio Editing
You can use separate tracks for different kinds audio. There are many reasons for doing this. Different video clips may be have different volume levels. By organising them on different tracks it can help you to adjust them effectively. You can also arrange soundbites, voice-overs, or different kinds of clips on different tracks as a way of organizing your video project.
Our goal is to make the video seem as natural as possible. The process is especially tricky when it comes to working with many audio clips. We can use fades and keyframes with audio levels to help make the listening experience as smooth as we can.
The secret to getting good audio for your project is to get down into the details. Here are two hands on exercises to help you do that.
Hands On: Using different tracks for different audio sources
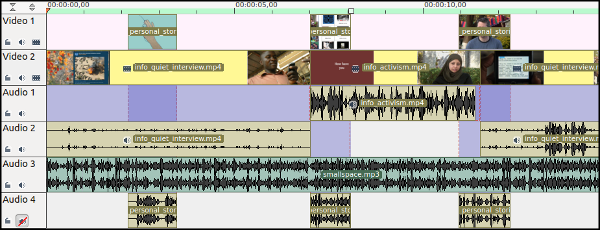
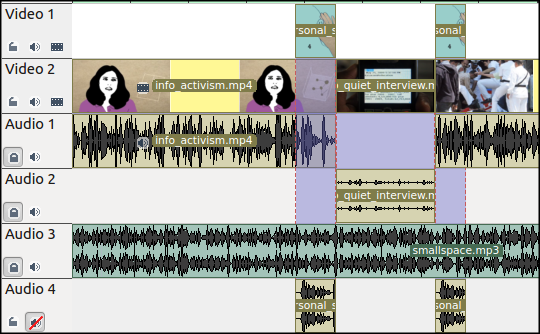
This hands on exercise gives an overview of arranging audio in a way that makes it easier to work with. It uses the following structure of tracks.
Audio 1: Clips at a correct volume
Audio 2: Quieter clips that need boosting
Audio 3: Music Track
Audio 4: Clips used for cutaways that need to be muted
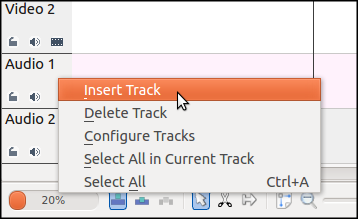
 To achieve a layout like the one above follow these steps. Create four audio tracks in your Timeline. Right click on the track header section on the left of your Timeline and select Insert Track.
Select the option to add an audio track after the last existing audio track. In this case after Audio 2.
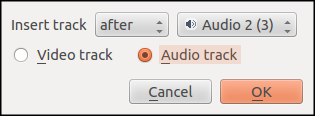
Repeat the process until you have enough audio tracks. We need four.
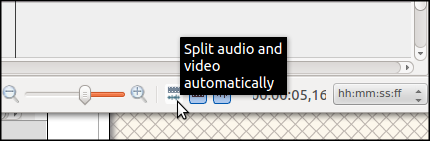
Click on the option on the bottom tool bar to automatically split the audio of clips. This will helps us to arrange the tracks in the way we want.
Add a clip with the correct audio level to the bottom video track of the timeline in the normal way.
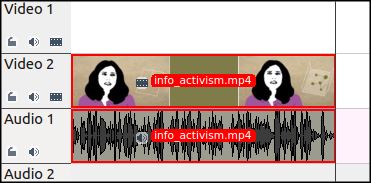
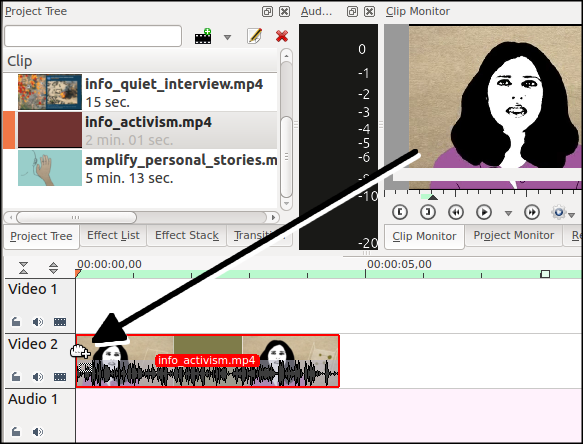 The audio part of the clip should separate automatically and now be viewable in Audio 1.
Next, add a music clip to Audio 3 by dragging it directly into the track.
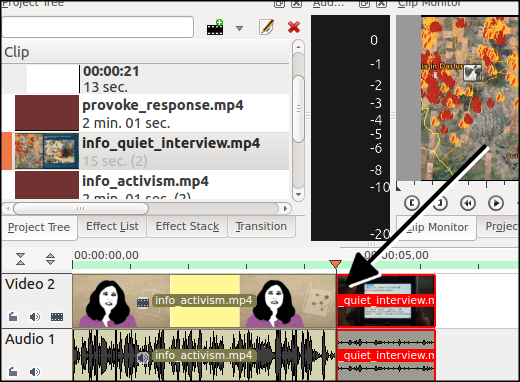
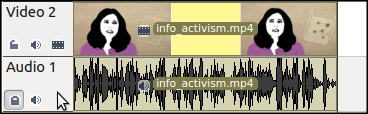
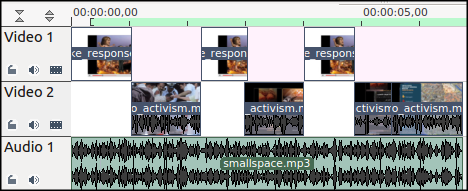
Then add a section of a quieter clip to the timeline. You may find that the audio is automatically added to Audio 1 as in the screenshot below.
To avoid this, click on the Lock Track icon in the bottom left of the Track header for Audio 1. This stops anything on that track from moving or anything from being added to the track.
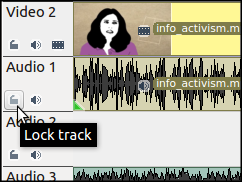
The icon should now show a lock image.
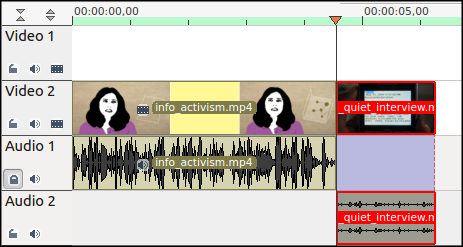
Now drag the quiet clip to bottom video track again. This time the audio clip should now appear on Audio 2.
Transferring your skills: It is worth knowing that other video editing software uses different ways of controlling which tracks are used when adding clips. However, the concept of locking a track to prevent changes to it is used by most software.
Finally, we want to use one audio track, Audio 4, for cutaway clips. We don't want to use the audio for cutway clips at all: to achive this we will mute this track. Before adding your cutaway clips to the timeline, we need to lock the audio tracks above Audio 4. Follow the settings in the header shown in the screenshot below to do this.
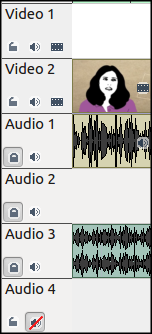
As you can see Audio Tracks 1-3 are locked and Audio 4 is muted. As we add video clips to the timeline their audio should appear in muted Audio 4 and so we won't hear them during play back.
It is now clear which audio tracks need to have the volume signal boosted. Once you have applied an effect to one clip, you can copy it and apply it to others. To do this select the clip with the effect and use the Ctrl + C keyboard short cut to copy it. Select all clips that should have that same effect. Right click your mouse and and choose Paste >Paste Effects.
Transferring your skills: For some video editing software there is the ability to do apply volume changes to all clips in a track using a volume slider for the whole track, or an 'audio mixer'.
Hand on: Fine tuning volume using key-frames
To get complete control of the volume level of our music track we will use key-frames, to control the volume effect. We will alternate interview sound bites (Video 2) and images together with music (Video 1 and Audio 1). We start the music loud, go quiet and then alternate loud and quiet.
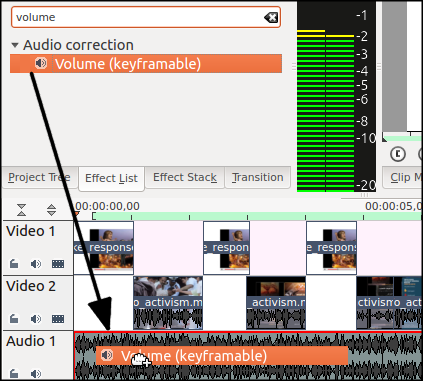
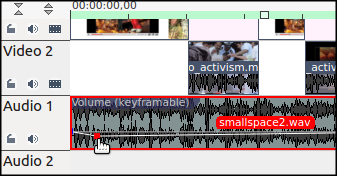
To start, add the Volume Keyframable effect to the music track in the usual way.
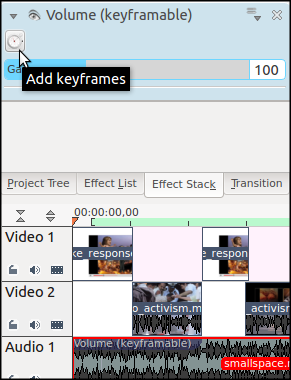
Make sure your playing head is right at the the start of your timeline. Click on the little clock symbol on in the Effect Stack.
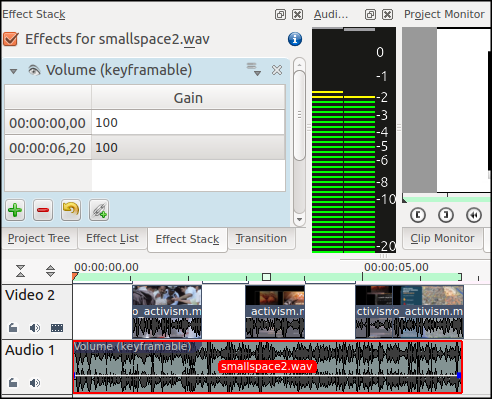
There is one key frame at position 00:00:00:00, the start of your clip, and the other at the end of your clip. Both have the Gain (volume) set to 100 as a default. A thin white line, which represents the volume, and little blue square boxes represent the key-frames.
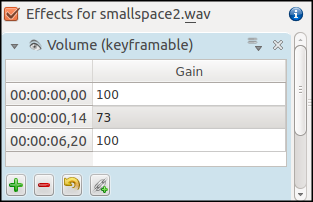
Add a new key-frame by double clicking on the white volume line around between half a second to a second into your video. You will see in the effect stack that a new key frame has been created.
You can also create a new keyframe by clicking on the green plus button in the Volume (keyframable) part of the Effects Stack. This will place the keyframe halfway between the current keyframes.
Adjusting the volume of the first two keyframes. Input the following numbers box in the Effect Stack.
First Keyframe : 0
Second Keyframe: 100
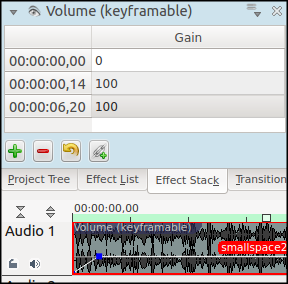
The volume of the track transitions slowly and smoothly between the old key-frames and the new one. You can adjusting the potion of your new key-frame in two ways by changing the the corresponding numbers box or clicking and dragging it in the timeline.
Add more keyframes to follow the pattern shown below.
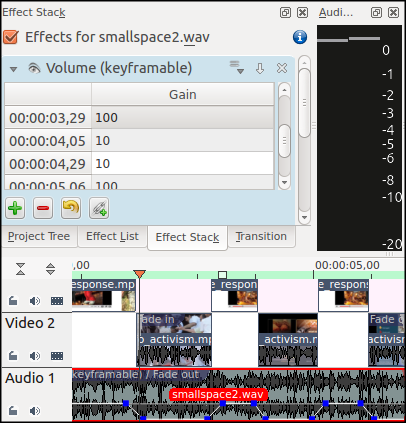
Try adding the keyframes using your mouse and then do fine adjusting in the Effects Stack. Listen back to the volume changes as they alternate between loud music and footage, then interviews with quiet music. Alter the settings until the transitions sound smooth and the speech sounds clear over the music.