Select Tool
The Select Tool is used to select, position and transform objects on the Canvas with the mouse or other input device.
How to Use
Start the Select Tool one of three ways:
- Click on the Select Tool button in the Toolbox;
- Press s;
- Press F1.
Select a Single Object
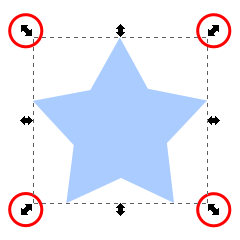
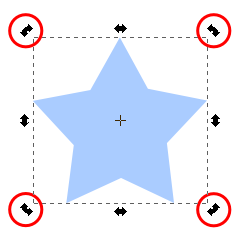
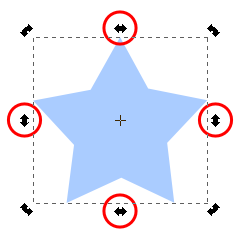
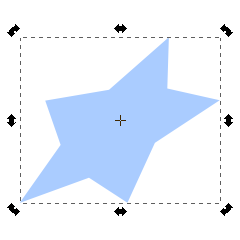
Click an object with the Select Tool to select it. The object will be framed with a bounding box (a black, dashed line) and scale handles will appear. Click again on the same object and the scale handles will change to rotation and skew handles.
If the object clicked is part of a group, the group will be selected, and any actions performed will affect the entire group as if it were one object. Double-clicking a group will allow you to subsequently select individual objects within the group.
Add Objects to and Remove Objects from Selection
Shift+Click objects to add them to the current selection or to remove them from the selection.
Select Objects Under other Objects
Alt+click selects the object under the cursor which is below (in z-order) the currently selected object under the cursor; if the bottom object is reached, Alt+click again selects the top object. Thus, several Alt+clicks will cycle selection through the z-order stack at the click point.
Combining Alt with Ctrl ("select in groups") and Shift ("add to selection") works, too. (Note that on Linux, many window managers steal Alt+click by default; reconfigure your WM so you can use Alt+click in Inkscape.)
Rubberband Selection
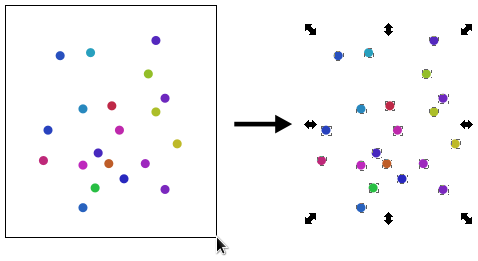
Select multiple objects by clicking on empty canvas space (or over objects which are unselectable) and dragging the rectangular "rubber band" over several objects (i.e. click at one place and keep the button pressed while moving the mouse).
Shift+Click+Drag will start the Rubberband Selection over any object.
Touch Selection
Alt+Click+Drag will allow you to select objects by drawing a freehand path (indicated by a red line); anything which the path touches will become part of the selection when you release the mouse button. This mode is convenient in situations where you need to select objects so intermingled that selecting them by the other methods is too difficult or tedious.
(Note that your selection must be empty, otherwise Alt dragging will move the selected objects instead.)
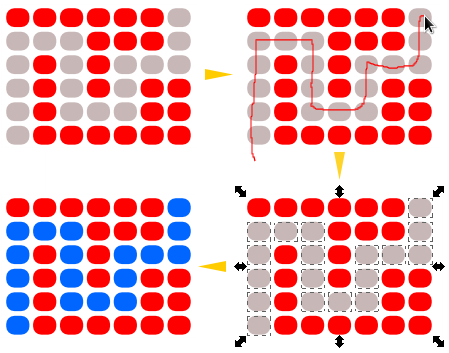
To start a touch selection from a point over an object, or to add to existing selection by touching, press Shift+Alt and then start to drag.
Invert Selection
Use ! to invert the selection to all unselected objects within the current layer; use Alt+! to invert the selection to all unselected objects within all unlocked layers.
Move
To move a selection with the mouse, click an object and hold the mouse button while dragging to the new location.(Dragging an object or several objects while holding Ctrl enables you to keep them aligned on an axis using the snap options.)
Move a selection precisely with the Select Tool either of two ways:
- Press the keyboard's cursor arrows to move selection 2 pixels in the direction of the arrow; Shift+Cursor will move by steps of 20 pixels; Alt+Cursor will move it by steps of one screen pixel, which will vary the actual movement based on zoom factor. (The default step can be changed in Inkscape Preferences.)
- Change the coordinates in the Tool Controls Bar X and Y coordinate boxes.
Transform
There are two modes within the Select Tool which are used to transform objects: scale and shear/rotate modes.
You can switch between modes by clicking the current selection or pressing Shift+S.
Scale
Scaling an object resizes it vertically, horizontally or both.
To resize a selection in scale mode, drag the handles at the corners or press < or > (the factor for key scaling can be set in Inkscape Preferences).
You may also scale a selection by adjusting the parameters of the widthand height boxes on the Tool Controls bar
To constrain the proportion of the selection while resizing, select the lock toggle on the Tool Controls Bar or hold Ctrl while dragging.
To use the center point of the object as the center of the transformation, hold Shift.Dragging the scale handles with Alt scales the selection by an integer factor, i.e. up to 2, 3, 4, etc. times the original size or down to 1/2. 1/3, 1/4, etc. of the original size either horizontally or vertically (or both). (In some Linux distributions, you may need to adjust your meta-key settings to make this work.)
Rotate
To rotate a selection, switch to shear/rotate mode and drag the arrow handles which are found at the corners or press [ or ].
Constrain rotations to 15 degree increments by holding Ctrl while rotating.
To rotate the selection around the opposite bounding box corner location, hold Shift while rotating.
Rotation Center
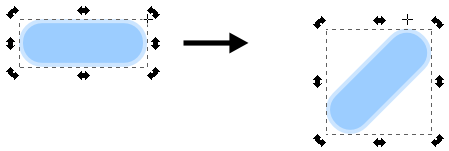
The Rotation Center of the selection specifies the point around which it rotates. The Rotation Center is marked with a crosshairs and may be placed anywhere on the canvas (not just within the bounding box of the object).
When several objects are selected, they use the Rotation Center of the first selected object. If the first object does not have center set (i.e. if it is in a default central position), then several objects will rotate around the geometric center of their common bounding box
To move the rotation center of an object, click and drag it to the desired spot. It will snap to the bounding box of the object as well as other snap points as set in the Preferences.
Compare rotation around center which is in it default position
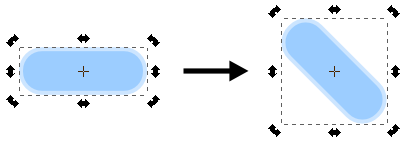
with rotation around center which is moved to upper right corner of a shape:
Shift+click on the rotation center resets it back to the center of the object's box.
Skew or Shear
To shift the parallel bounding edges of the selection in opposite directions so that the selection is warped diagonally, drag on the shearing handles at the top, bottom or sides of the selection while in shear/rotate mode.
Flip
Flip a selection either vertically or horizontally by
- clicking the Flip buttons on the Tool Controls Bar
- selecting Object->Flip Vertical or Object->Flip Horizontal
- pressing v or h
Flipping a selection while in scale mode makes it flip within its bounding box, so that the bounding box remains fixed:
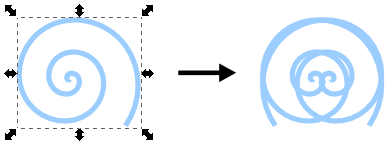
However, in rotate/shear mode flipping happens over an axis through the rotation center:
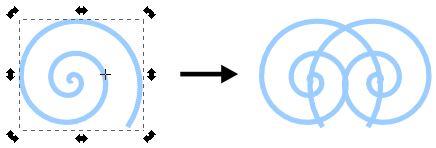
Scale Stroke Width, Rectangle Corners and Fills
There are four preferences that control whether to transform stroke widths, rectangle corners, gradient fills, and pattern fills when a selection is transformed.
They are represented by four toggle buttons in the Tool Controls Bar. Be sure to select the appropriate toggles before transforming any selection.
Tips
-
Double-clicking an object with the Select Tool and the tool will activate the appropriate tool to edit the object (i.e., if you double-click an ellipse, the Ellipse Tool will be activated, etc.).
- The Transform Window (-> or Shift+Ctrl+M) can be used for precise transformations.
- Press Esc to cancel selection or cancel an incomplete move or transformation.
- Ctrl+Click or Shift+Ctrl+Click will select objects within groups from outside that group.
- Drag Selected: in Select, Alt+Drag moves the currently selected object(s) no matter where you start the drag, unlike regular drag that first selects the object under cursor. This is convenient for dragging objects that are behind other objects in z-order. (On Linux, you may need to disable dragging the window with Alt in your window manager's settings if you want to use this "drag selected" method.)


