


Add Your Activity Code To Version Control
What Is Version Control?
"If I have seen further it is only by standing on the shoulders of giants."
Isaac Newton, in a letter to Robert Hooke.
Writing an Activity is usually not something you do by yourself. You will usually have collaborators in one form or another. When I started writing Read Etexts I copied much of the code from the Read Activity. When I implemented text to speech I adapted a toolbar from the Speak Activity. When I finally got my copied file sharing code working the author of Image Viewer thought it was good enough to copy into that Activity. Another programmer saw the work I did for text to speech and thought he could do it better. He was right, and his improvements got merged into my own code. When I wrote Get Internet Archive Books someone else took the user interface I came up with and made a more powerful and versatile Activity called Get Books. Like Newton, everyone benefits from the work others have done before.
Even if I wanted to write Activities without help I would still need collaborators to translate them into other languages.
To make collaboration possible you need to have a place where everyone can post their code and share it. This is called a code repository. It isn't enough to just share the latest version of your code. What you really want to do is share every version of your code. Every time you make a significant change to your code you want to have the new version and the previous version available. Not only do you want to have every version of your code available, you want to be able to compare any two versions your code to see what changed between them. This is what version control software does.
The three most popular version control tools are CVS, Subversion, and Git. Git is the newest and is the one used by Sugar Labs. While not every Activity has its code in the Sugar Labs Git repository (other free code repositories exist) there is no good reason not to do it and significant benefits if you do. If you want to get your Activity translated into other languages using the Sugar Labs Git repository is a must.
Git Along Little Dogies
Git is a distributed version control system. This means that not only are there copies of every version of your code in a central repository, the same copies exist on every user's computer. This means you can update your local repository while you are not connected to the Internet, then connect and share everything at one time.
There are two ways you will interact with your Git repository: through Git commands and through the website at http://git.sugarlabs.org/. We'll look at this website first.
Go to http://git.sugarlabs.org/ and click on the Projects link in the upper right corner:
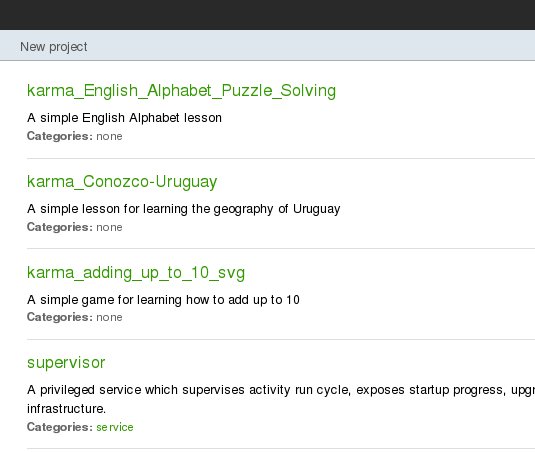
You will see a list of projects in the repository. They will be listed from newest to oldest. You'll also see a New Project link but you'll need to create an account to use that and we aren't ready to do that yet.
If you use the Search link in the upper right corner of the page you'll get a search form. Use it to search for "read etexts". Click on the link for that project when you find it. You should see something like this:
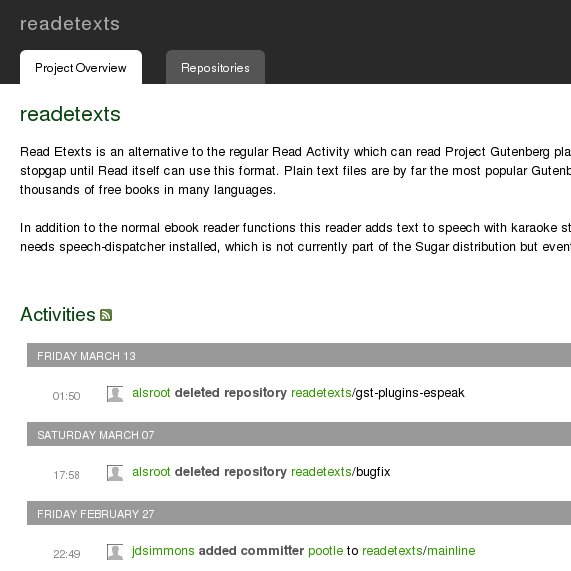
This page lists some of the activity for the project but I don't find it particularly useful. To get a much better look at your project start by clicking on the repository name on the right side of the page. In this case the repository is named mainline.
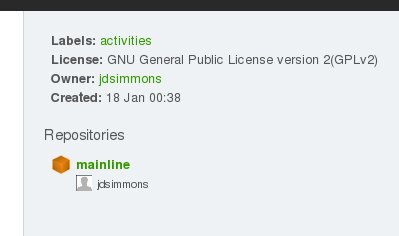
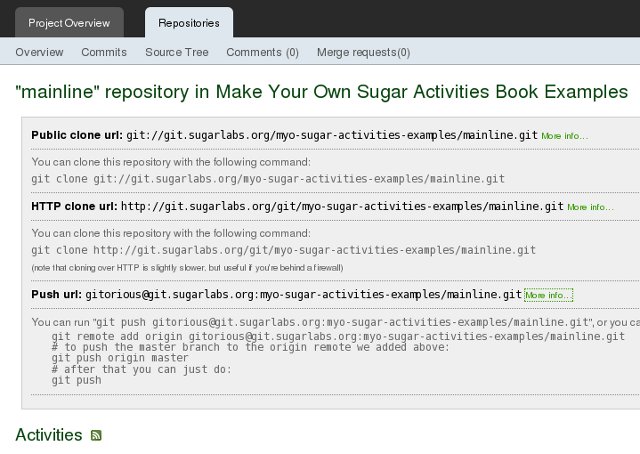
You'll see something like this at the top of the page:
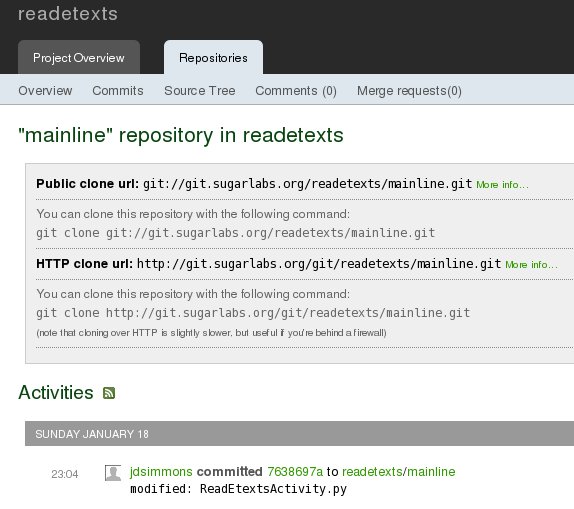
This page has some useful information on it. First, have a look at the Public clone url and the HTTP clone url. You need to click on More info... to see either one. If you run either of these commands from the console you will get a copy of the git repository for the project copied to your computer. This copy will include every version of every piece of code in the project. You would need to modify it a bit before you could share your changes back to the main repository, but everything would be there.
The list under Activities is not that useful, but if you click on the Source Tree link you'll see something really good:
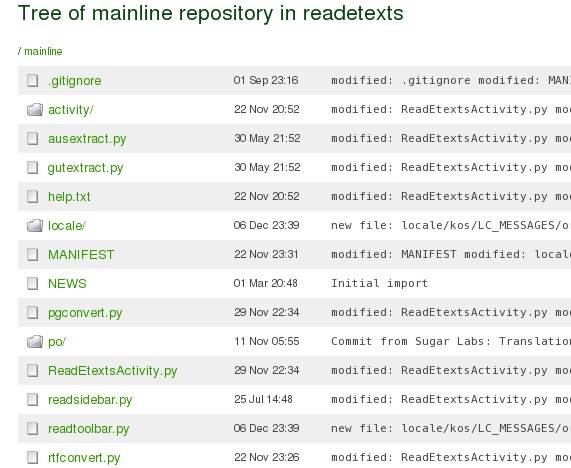
Here is a list of every file in the project, the date it was last updated, and a comment on what was modified. Click on the link for ReadEtextsActivity.py and you'll see this:
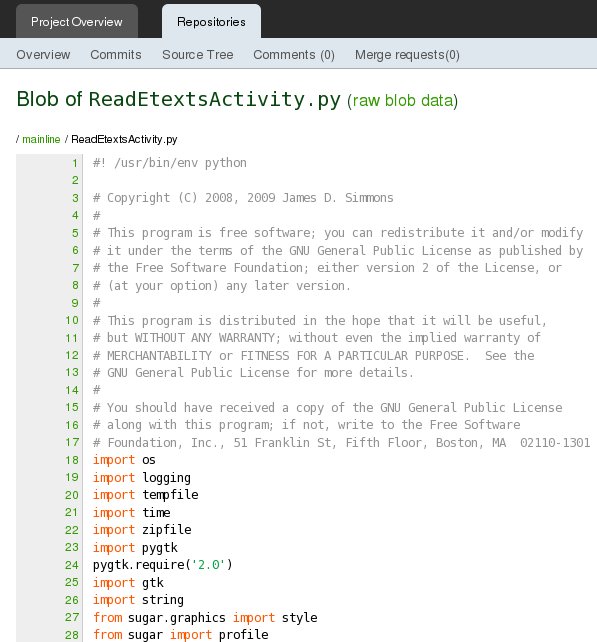
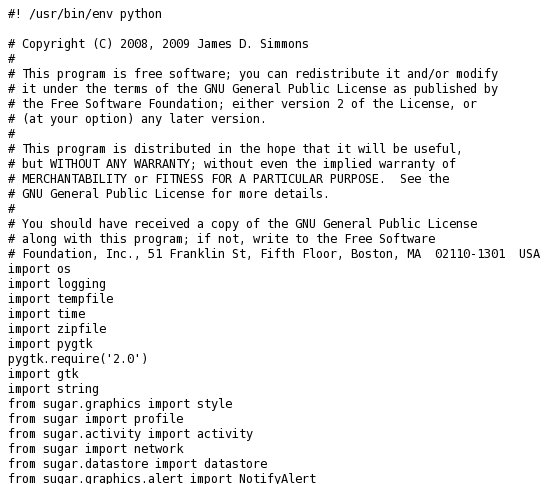
This is the latest code in that file in pretty print format. Python keywords are shown in a different color, there are line numbers, etc. This is a good page for looking at code on the screen, but it doesn't print well and it's not much good for copying snippets of code into Eric windows either. For either of those things you'll want to click on raw blob data at the top of the listing:
We're not done yet. Use the Back button to get back to the pretty print listing and click on the Commits link. This will give us a list of everything that changed each time we committed code into Git:
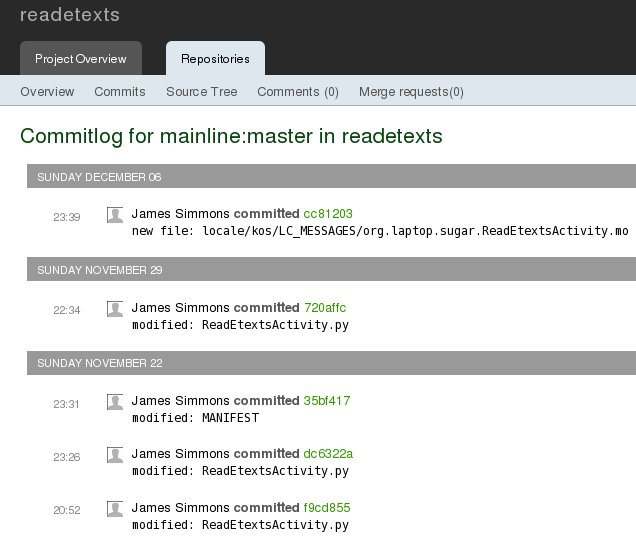
You may have noticed the odd combination of letters and numbers after the words James Simmons committed. This is a kind of version number. The usual practice with version control systems is to give each version of code you check in a version number, usually a simple sequence number. Git is distributed, with many separate copies of the repository being modified independently and then merged. That makes using just a sequential number to identify versions unworkable. Instead, Git gives each version a really, really large random number. The number is expressed in base 16, which uses the symbols 0-9 and a-f. What you see in green is only a small part of the complete number. The number is a link, and if you click on it you'll see this:

At the top of the page we see the complete version number used for this commit. Below the gray box we see the full comment that was used to commit the changes. Below that is a listing of what files were changed. If we look further down the page we see this:
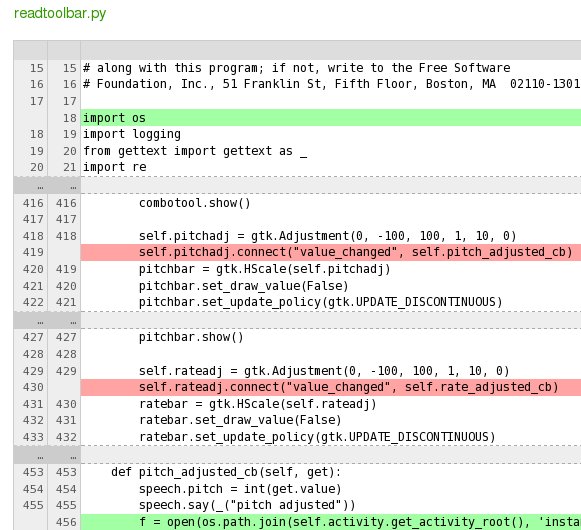
This is a diff report which shows the lines that have changed between this version and the previous version. For each change it shows a few lines before and after the change to give you a better idea of what the change does. Every change shows line numbers too.
A report like this is a wonderful aid to programming. Sometimes when you're working on an enhancement to your program something that had been working mysteriously stops working. When that happens you will wonder just what you changed that could have caused the problem. A diff report can help you find the source of the problem.
By now you must be convinced that you want your project code in Git. Before we can do that we need to create an account on this website. That is no more difficult than creating an account on any other website, but it will need an important piece of information from us that we don't have yet. Getting that information is our next task.
Setting Up SSH Keys
To send your code to the Gitorious code repository you need an SSH public/private key pair. ⁞ SSH is a way of sending data over the network in encrypted format. (In other words, it uses a secret code so nobody but the person getting the data can read it). Public/private key encryption is a way of encrypting data that provides a way to guarantee that the person who is sending you the data is who he claims to be.
In simple terms it works like this: the SSH software generates two very large numbers that are used to encode and decode the data going over the network. The first number, called the private key, is kept secret and is only used by you to encode the data. The second number, called the public key, is given to anyone who needs to decode your data. He can decode it using the public key; there is no need for him to know the private key. He can also use the public key to encode a message to send back to you and you can decode it using your private key.
Git uses SSH like an electronic signature to verify that code changes that are supposed to be coming from you actually are coming from you. The Git repository is given your public key. It knows that anything it decodes with that key must have been sent by you because only you have the private key needed to encode it.
We will be using a tool called OpenSSH to generate the public and private keys. This is included with every version of Linux so you just need to verify that it has been installed. Then use the ssh-keygen utility that comes with OpenSSH to generate the keys:
[jim@olpc2 ~]$ ssh-keygen
Generating public/private rsa key pair.
Enter file in which to save the key (/home/jim/.ssh/id_rsa):
By default ssh-keygen generates an RSA key, which is the kind we want. By default it puts the keyfiles in a directory called /yourhome/.ssh and we want that too, so DO NOT enter a filename when it asks you to. Just hit the Enter key to continue.
[jim@olpc2 ~]$ ssh-keygen
Generating public/private rsa key pair.
Enter file in which to save the key (/home/jim/.ssh/id_rsa):
Created directory '/home/jim/.ssh'.
Enter passphrase (empty for no passphrase):
Now we DO want a passphrase here. A passphrase is like a password that is used with the public and private keys to do the encrypting. When you type it in you will not be able to see what you typed. Because of that it will ask you to type the same thing again, and it will check to see that you typed them in the same way both times.
[jim@olpc2 ~]$ ssh-keygen
Generating public/private rsa key pair.
Enter file in which to save the key (/home/jim/.ssh/id_rsa):
Created directory '/home/jim/.ssh'.
Enter passphrase (empty for no passphrase):
Enter same passphrase again:
Your identification has been saved in /home/jim/.ssh/id_rsa.
Your public key has been saved in /home/jim/.ssh/id_rsa.pub.
The key fingerprint is:
d0:fe:c0:0c:1e:72:56:7a:19:cd:f3:85:c7:4c:9e:18
jim@olpc2.simmons
The key's randomart image is:
+--[ RSA 2048]----+
|        oo  E=.  |
|       + o+ .+=. |
|    . B +  o.oo  |
|     = O    .    |
|      . S        |
|         o       |
|          .      |
|                 |
|                 |
+-----------------+
When choosing a passphrase remember that it needs to be something you can type reliably without seeing it and it would be better if it was not a word you can find in the dictionary, because those are easily broken. When I need to make a password I use the tool at http://www.multicians.org/thvv/gpw.html. This tool generates a bunch of nonsense words that are pronounceable. Pick one that appeals to you and use that.
Now have a look inside the .ssh directory. By convention every file or directory name that begins with a period is considered hidden by Linux, so it won't show up in a GNOME file browser window unless you use the option on the View menu to Show Hidden Files. When you display the contents of that directory you'll see two files: id_rsa and id_rsa.pub. The public key is in id_rsa.pub. Try opening that file with gedit (Open With Text Editor) and you'll see something like this:
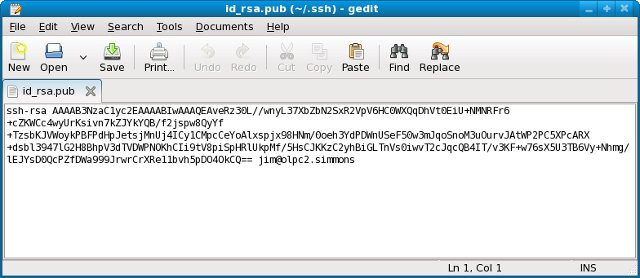
When you create your account on git.sugarlabs.org there will be a place where you can add your public SSH key. To do that use Select All from the Edit menu in gedit, then Copy and Paste into the field provided on the web form.
Create A New Project
I'm going to create a new Project in Git for the examples for this book. I need to log in with my new account and click the New Project link we saw earlier. I get this form, which I have started filling in:
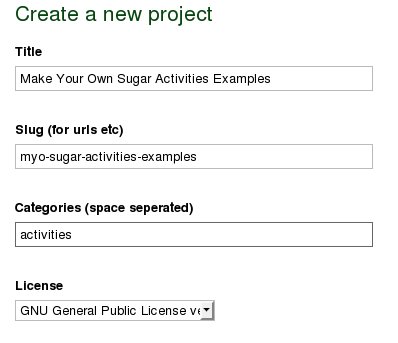
The Title is used on the website, the Slug is a shortened version of the title without spaces used to name the Git repository. Categories are optional. License is GPL v2 for my projects. You can choose from any of the licenses in the list for your own Projects, and you can change the license entry later if you want to. You will also need to enter a Description for your project.
Once you have this set up you'll be able to click on the mainline entry for the Project (like we did with Read Etexts before) and see something like this:
The next step is to convert our project files into a local Git repository, add the files to it, then push it to the repository on git.sugarlabs.org. We need to do this because you cannot clone an empty repository, and our remote repository is currently empty. To get around that problem we'll push the local repository out to the new remote repository we just created, then clone the remote one and delete our existing project and its Git repository. From then on we'll do all our work in the cloned repository.
This process may remind you of the Edward Albee quote, "Sometimes a person has to go a very long distance out of his way to come back a short distance correctly". Fortunately we only need to do it once per project. Enter the commands shown below in bold after making you project directory the current one:
git init
Initialized empty Git repository in
/home/jim/olpc/bookexamples/.git/
git add *.py
git add activity
git add MANIFEST
git add .gitignore
git commit -a -m "Create repository and load"
[master (root-commit) 727bfe8] Create repository and load
 9 files changed, 922 insertions(+), 0 deletions(-)
 create mode 100644 .gitignore
 create mode 100644 MANIFEST
 create mode 100755 ReadEtexts.py
 create mode 100644 ReadEtextsActivity.py
 create mode 100644 ReadEtextsActivity2.py
 create mode 100644 activity/activity.info
 create mode 100644 activity/read-etexts.svg
 create mode 100755 setup.py
 create mode 100644 toolbar.py
I have made an empty local Git repository with git init, then I've used git add to add the important files to it. (In fact git add doesn't actually add anything itself; it just tells Git to add the file on the next git commit). Finally git commit with the options shown will actually put the latest version of these files in my new local repository.
To push this local repository to git.sugarlabs.org we use the commands from the web page:
git remote add origin \
gitorious@git.sugarlabs.org:\
myo-sugar-activities-examples/mainline.git
git push origin master
Counting objects: 17, done.
Compressing objects: 100% (14/14), done.
Writing objects: 100% (15/15), 7.51 KiB, done.
Total 15 (delta 3), reused 0 (delta 0)
To gitorious@git.sugarlabs.org:myo-sugar-activities-examples/
mainline.git
   2cb3a1e..700789d  master -> master
=> Syncing Gitorious...
Heads up: head of  changed to
700789d3333a7257999d0a69bdcafb840e6adc09 on master
Notify cia.vc of 727bfe819d5b7b70f4f2b31d02f5562709284ac4  on
myo-sugar-activities-examples
Notify cia.vc of 700789d3333a7257999d0a69bdcafb840e6adc09  on
myo-sugar-activities-examples
[OK]
rm *
rm activity -rf
rm .git -rf
cd ~
rm Activity/ReadEtextsII
mkdir olpc
cd olpc
mkdir bookexamples
cd bookexamples
git clone \
git://git.sugarlabs.org/\
myo-sugar-activities-examples/mainline.git
Initialized empty Git repository in
/home/jim/olpc/bookexamples/mainline/.git/
remote: Counting objects: 18, done.
remote: Compressing objects: 100% (16/16), done.
remote: Total 18 (delta 3), reused 0 (delta 0)
Receiving objects: 100% (18/18), 8.53 KiB, done.
Resolving deltas: 100% (3/3), done.
The lines in bold are the commands to enter, and everything else is messages that Git sends to the console. I've split some of the longer Git commands with the backslash (\) to make them fit better on the printed page, and wrapped some output lines that would normally print on one line for the same reason. It probably isn't clear what we're doing here and why, so let's take it step by step:
- The first command git remote add origin tells the remote Git repository that we are going to send it stuff from our local repository.
- The second command git push origin master actually sends your local Git repository to the remote one and its contents will be copied in. When you enter this command you will be asked to enter the SSH pass phrase you created in the last section. GNOME will remember this phrase for you and enter it for every Git command afterwards so you don't need to. It will keep doing this until you log out or turn off the computer.
- The next step is to delete our existing files and our local Git repository (which is contained in the hidden directory .git). The rm .git -rf means "Delete the directory .git and everything in it". rm is a Unix command, not part of Git. If you like you can delete your existing files after you create the cloned repository in the next step. Note the command rm Activity/ReadEtextsII, which deletes the symbolic link to our old project that we created by running ./setup.py dev. We'll need to go to our new cloned project directory and run that again before we can test our Activity again.
- Now we do the git clone command from the web page. This takes the remote Git repository we just added our MANIFEST file to and makes a new local repository in directory /yourhome/olpc/bookexamples/mainline.
Finally we have a local repository we can use. Well, not quite. We can commit our code to it but we cannot push anything back to the remote repository because our local repository isn't configured correctly yet.
What we need to do is edit the file config in directory .git in /yourhome/olpc/bookexamples/mainline. We can use gedit to do that. We need to change the url= entry to point to the Push url shown on the mainline web page. When we're done our config file should look like this:
[core]
	repositoryformatversion = 0
	filemode = true
	bare = false
	logallrefupdates = true
[remote "origin"]
        url = gitorious@git.sugarlabs.org:
myo-sugar-activities-examples/mainline.git
	fetch = +refs/heads/*:refs/remotes/origin/*
[branch "master"]
	remote = origin
	merge = refs/heads/master
The line in bold is the only one that gets changed. It is split here to make it fit on the printed page. In your own files it should all be one line with no spaces between the colon(:) that ends the first line and the beginning of the second line.
From now on anyone who wants to work on our project can get a local copy of the Git repository by doing this from within the directory where he wants the repository to go:
git clone git://git.sugarlabs.org/\
myo-sugar-activities-examples/mainline.git
He'll have to change his .git/config file just like we did, then he'll be ready to go.
Everyday Use Of Git
While getting the repositories set up to begin with is a chore, daily use is not. There are only a few commands you'll need to work with. When we left off we had a repository in /yourhome/olpc/bookexamples/mainline with our files in it. We will need to add any new files we create too.
We use the git add command to tell Git that we want to use Git to store a particular file. This doesn't actually store anything, it just tells Git our intentions. The format of the command is simply:
git add file_or_directory_name
There are files we don't want to add to Git, to begin with those files that end in .pyc. If we never do a git add on them they'll never get added, but Git will constantly ask us why we aren't adding them. Fortunately there is a way to tell Git that we really, really don't want to add those files. We need to create a file named .gitignore using gedit and put in entries like this:
*.pyc
*.e4p
*.zip
dist
locale
.eric4project/
.ropeproject/
These entries will also ignore project files used by Eric and zip files containing ebooks, The dist entry refers to the dist directory, which is where packaged Activities go, and the locale entry refers to a locale directory that will be created when we package the Activity. Neither of these directories belong in the Git repository. Once we have the .gitignore file created in the mainline directory we can add it to the repository:
git add .gitignore
git commit -a -m "Add .gitignore file"
From now on Git will no longer ask us to add .pyc or other unwanted files that match our patterns. If there are other files we don't want in the repository we can add them to .gitignore either as full file names or directory names or as patterns like *.pyc.
In addition to adding files to Git we can remove them too:
git rm filename
Note that this just tells Git that from now on it will not be keeping track of a given filename, and that will take effect at the next commit. Old versions of the file are still in the repository.
If you want to see what changes will be applied at the next commit run this:
git status
# On branch master
# Changed but not updated:
#   (use "git add <file>..." to update what will
#   be committed)
#
#	modified:   ReadEtextsActivity.py
#
no changes added to commit (use "git add" and/or
"git commit -a")
Finally, to put your latest changes in the repository use this:
git commit -a -m "Change use of instance directory to tmp"
Created commit a687b27: Change use of instance
directory to tmp
 1 files changed, 2 insertions(+), 2 deletions(-)
If you leave off the -m an editor will open up and you can type in a comment, then save and exit. Unfortunately by default the editor is vi, an old text mode editor that is not friendly like gedit.
When we have all our changes done we can send them to the central repository using git push:
git push
Counting objects: 5, done.
Compressing objects: 100% (3/3), done.
Writing objects: 100% (3/3), 322 bytes, done.
Total 3 (delta 2), reused 0 (delta 0)
To gitorious@git.sugarlabs.org:
myo-sugar-activities-examples/mainline.git
   700789d..a687b27  master -> master
=> Syncing Gitorious...
Heads up: head of  changed to
a687b27e2f034e5a17d2ca2fe9f2787c7f633e64 on master
Notify cia.vc of a687b27e2f034e5a17d2ca2fe9f2787c7f633e64
on myo-sugar-activities-examples
[OK]
We can get the latest changes from other developers by doing git pull:
git pull
remote: Counting objects: 17, done.
remote: Compressing objects: 100% (14/14), done.
remote: Total 15 (delta 3), reused 0 (delta 0)
Unpacking objects: 100% (15/15), done.
From gitorious@git.sugarlabs.org:
myo-sugar-activities-examples/mainline
   2cb3a1e..700789d  master     -> origin/master
Updating 2cb3a1e..700789d
Fast forward
 .gitignore               |    6 +
 MANIFEST                 |  244 +--------------------------
---------
 ReadEtexts.py            |  182 +++++++++++++++++++++++++++
 ReadEtextsActivity.py    |  182 +++++++++++++++++++++++++++
 ReadEtextsActivity2.py   |  311 +++++++++++++++++++++++++++
+++++++++++++++++++
 activity/activity.info   |    9 ++
 activity/read-etexts.svg |   71 +++++++++++
 setup.py                 |   21 +++
 toolbar.py               |  136 ++++++++++++++++++++
 9 files changed, 921 insertions(+), 241 deletions(-)
 create mode 100644 .gitignore
 create mode 100755 ReadEtexts.py
 create mode 100644 ReadEtextsActivity.py
 create mode 100644 ReadEtextsActivity2.py
 create mode 100644 activity/activity.info
 create mode 100644 activity/read-etexts.svg
 create mode 100755 setup.py
 create mode 100644 toolbar.py