Subscribe to Video Podcasts
This chapter details how to subscribe to a Video Channel from an RSS feed from a video sharing site or video blog. Note that you can use Miro to subscribe to video channels that aren't listed in the Miro interface.
We assume that you have used a browser to open a site that has a video podcast available. You need to find out the web address ('URL') of the video podcast or channel. Technically, this is channel called an RSS feed. You find RSS feeds on Video Blogs or news sites. They are normally identified by a graphic which links to a text file. Some sites might refer to it as a 'vodcast'.
The image associated with the channel could be anything. There has been an attempt to standardise the icons related to 'RSS feeds' and it has been somewhat succesful. For example if you see an image like this it indicates an RSS Feed:

However there are no rules and any link or image might be used.
- Once you have found the link, right Click (Ctrl + Click on Mac) it and choose 'Copy Link Location' or 'Copy Shortcut'. This copies the URL into the computer's memory or 'clipboard'.

- Now that you have the URL of the Channel 'in memory', open Miro and copy this information to Miro. To do this, select Channels > Add Channel on the Miro menu bar as shown below:

When the Add Channel box appears, you might see the URL of the channel already in it: 
This happens because Miro knows that there is something in the memory of your computer. When you open this box, Miro guesses that what is in memory is probably the URL of a channel.
- If it doesn't appear, then try pressing Ctrl + V (or Apple + V on a Mac) to 'paste' the address of the channel into the box. When the address appears in the "URL" box, click "Create Channel". Miro adds the channel to the list on the left (called the 'sidebar'):

Miro automatically starts updating the list of videos available through this channel. This may take some time depending on how much content is available on the new channel and how fast or slow your Internet connection is.
Adding Videos From a Local Drive
You might want use Miro to watch videos that are located on your computer, rather than downloaded from the Internet. They might be on your hard disk drive, or on a removeable drive such as a USB "stick". You can add them to your Miro library so that you can watch them easily, whenever you want.
- On the "File" menu, click "Open".

A window opens to let you select the file.
- Browse to the location where the file is on your local drive, select it, and click "Open". The video immediately begins playing in Miro.
- In the lower left corner of the playback window, click "ADD TO LIBRARY".

The text you just clicked changes to "DELETE". When the video finishes (or you stop it), it appears
- In the Miro sidebar, click "Single Items". The video that you added appears here, because it is not part of a channel.

If you decide you don't want this video in your library any more, click the "Remove" button for the video when it is shown in the right side of the window. A window appears that asks whether you want to completely delete the file, or just remove it from the library. If you want to keep the video on your computer, click "Remove Entry".

Automatic Downloads
If you decide you like a channel in Miro, you can set up Miro to automatically download any new videos that gets published on that channel. In the image below, you can see that AUTO DOWNLOAD is turned off :

If you click the button ('OFF') you get three choices :
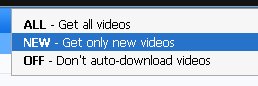
- 'ALL': Miro downloads all the videos in a channel.
- 'New': Miro gets new videos published in this channel whenever you start Miro or when you ask Miro to check for new videos.
- 'OFF': Miro does not automatically download videos. You must select each video that you want to download.
Windows Installation
Software name : Miro
Homepage : http://www.getmiro.com/
Software version used for this installation : 1.2.8
Operating System used for this installation : Microsoft Windows (XP)
Recommended Hardware : 200 MHz processor (CPU) minimum
Go to the home page for Miro (http://www.getmiro.com) and the page should recognise your operating system and offer you to the relevant download option in the green download box.
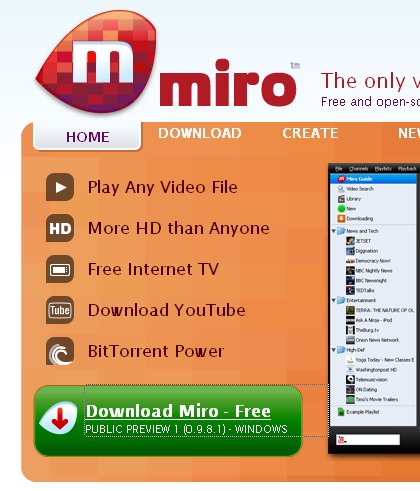
If this is not the correct version — for example if you are using a Windows computer and it suggests a download for Mac — you can select the download tab in the top menu.
Otherwise, if it is the right version, click on the green box and you are asked to download Miro:
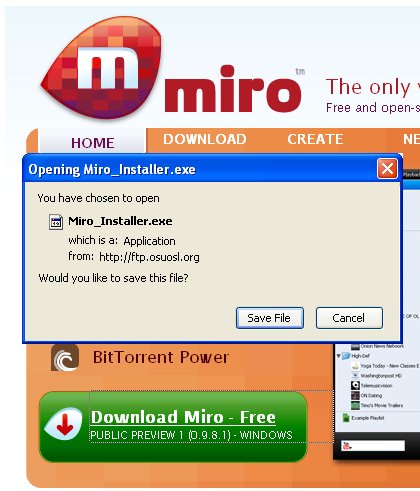
You are offered to save the file on your computer (or your browser may be set up to download it automatically to your Desktop or a folder you have chosen). If you are presented with the above window, then clicking "Save File" leads you to a file browser.
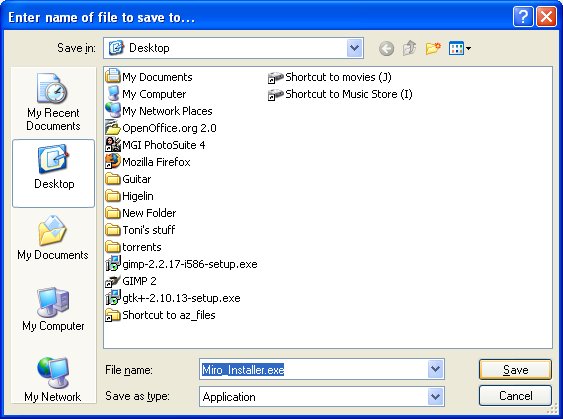
Choose a location to download your Miro install file to and click"Save". When the file has been downloaded, browse to where the file has been downloaded and double-click it. This causes an installer window to appear:
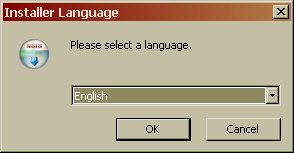
The installer shows a list of fifteen or so languages. Choose the language that you want to use for the application menus and messages, and click "OK".
Follow these steps to proceed through the setup program:
- On the "Welcome to Miro" setup page, choose either "Easy Install" or "Custom Install", and click "Next".
- If you chose "Custom Install", you can choose options on the following screens. If you are unsure about any option, you can accept the default options that are already selected. On each screen, click "Next" after you have chosen options.
- On the "Choose Components" screen, select the boxes for the components of Miro that you want to be installed.
- On the "Choose Install Location" screen, specify where on your computer to install Miro's files.
- On the "Choose a Start Menu" screen, specify a folder on your Start Menu for Miro's shortcuts. Click "Install".
A progress bar appears while the setup program installs files on your computer.
- The setup program may offer to install other software. These programs are other free, libre open source applications. Choose an option for whether to install this software, and click "Next".
- If you want to run Miro right away, leave the "Run Miro" box selected. Otherwise, clear the box. Click "Finish" to end the setup program.
Running Miro for the First Time
The first time that you run Miro, you see the "Miro First Time Setup" window.
- If you want Miro to run whenever your computer starts, leave "Yes" selected. Otherwise, select "No". Click "Next".
- Choose one of the following options:
- If you want Miro to look for video files that are already on your computer, leave "Yes" selected. If you keep your video files in a location that is not typical, select "Search custom folder" and click "Change", which opens a file browser so you can select your video folder. Click "Finish" when Miro is done searching for files.
- If you don't want Miro to look for video files, select "No" and click "Finish".
Once you click "Finish", Miro starts for the first time.
Installing Miro on Ubuntu
Software name : Miro
Homepage : http://www.getmiro.com/
Software version used for this installation : 1.2.8
Operating System used for this installation : Ubuntu 8.04 (Hardy)
Recommended Hardware : 200 MHz processor (CPU) minimum
To install Miro on Ubuntu, you need to know a little about the Synaptic Package Manager. If you already know about the package manager, then skip to the section "Installing Miro".
Synaptic Package Manager
The Synaptic Package Manager (SPM) is used for more than just installing software. It can also upgrade your entire operating system, and manage all software installed on your computer. However most people use SPM for just installing new software. Before you embark on this process, there are a few concepts that you may wish to get familiar with. It's not crucial you understand them thoroughly, so just read the explanations and then let it soak in over time. The ideas behind SPM will become clearer with use.
What is a repository?
SPM can automate the installation of software on your computer because it has a direct connection to one or more online software repositories. These repositories are vast archives of programs that have been pre-configured for installation on your operating system. When your computer is online, SPM can connect to these archives, check what software is available for installation, and present you with a list of installable software. All you have to do is select the software from the list that you want. SPM then downloads the software from the repository and takes care of the installation process.
So SPM is actually a repository manager: it manages which repositories (there are many) you wish to access, and which programs to download and install from those repositories.
SPM allows you to choose which repositories it accesses through its settings. The default repositories used by Ubuntu can be extended through the SPM settings so you can access a wider range of programs. Ubuntu calls each repository by a simple name. They are: Main, Universe, Multiverse, Restricted. By default Ubuntu only uses the Main online repository. If you wish to access you the other repositories, you must do this by changing repository settings of SPM.
What is a package?
When SPM downloads a programs for installation, it is in the form known as a 'package'. This means that it is a compressed archive of the program, pre-configured so that it can install nicely on your computer. If the package has been configured nicely (and the Ubuntu project team spends a lot of time making sure this is the case), then many of the headaches that installing software can bring are taken away — it's the aspirin of software installation. One of the biggest issues with installing software on any form of Linux (Ubuntu is one of many types of Linux), is dependencies. Dependencies are all the other packages required by a particular package. If, for example, I want to install an audio editor, that audio editor software may use some functionality of other programs to do its job.
SPM takes the (often) dark art of dependencies away from you, and manages this itself. So if you wish to install a program and it has dependencies (and the list can be long), you don't have to work this out yourself. SPM knows already what is needed, finds it, and installs it along with the software you have chosen.
So, SPM, as well as managing which repositories you access, is also a package management software. Hence the name: Synaptic Package Manager.
apt
You don't really need to know about 'apt', so if you are on the verge of being confused then don't read this short section. If you are a geek wannabe, then read on.
Ubuntu is a form of Linux that has derived from another form of Linux called Debian. This family of Linux has in common (amongst other things) the package/repository management system. Both Ubuntu and Debian use the apt system for managing packages. APT is an acronym for Advanced Package Tool.
SPM is actually a 'front end' (graphical interface) for controlling 'apt'. So SPM is the nice user interface that you see, but the real work is done by 'apt'. There are other ways of managing 'apt', such as the command line interface known as apt-get. In the world of Linux, there are many varieties of Linux users and they have their own ways of doing things. In general it's safe to say most Debian users use apt-get, and most Ubuntu users are happier using SPM.
Configuring Synaptic Package Manager
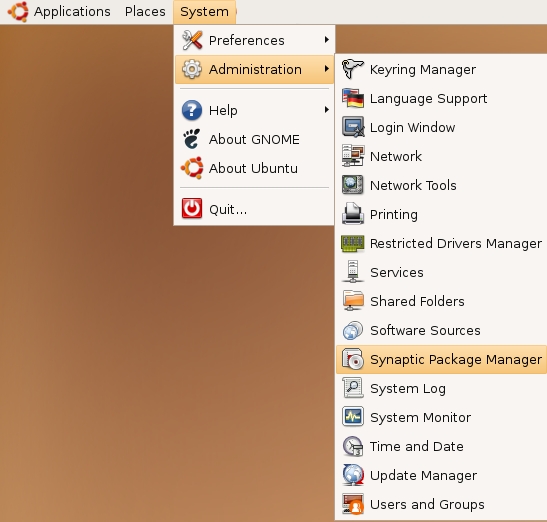
To install most software on Ubuntu, you need to change the default repository settings of SPM, because many programs are not contained in the default repository. To do this, you need to open the Synaptic Package Manager, which you can do via the System menu. If you haven't changed the default Desktop of Ubuntu, then the System menu can be accessed at the top left of your screen:
If all is good, you are prompted for a password.
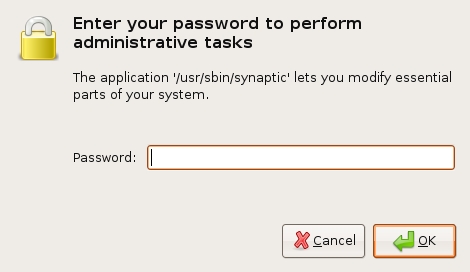
Here you must enter your password (the same one you use to log into the system). If you don't know the password, then you have a problem and it's probably caused by the fact that the computer you are using is not yours. In this case you have to find the computer's owners and ask them for the password (which is usually not polite unless you know them well) or ask them to input the password while you look casually in the other direction.
Assuming the password entered is correct, you now see the SPM open in front of you. It may be that you first see the following 'Quick Introduction' (which appears if you haven't used SPM before).
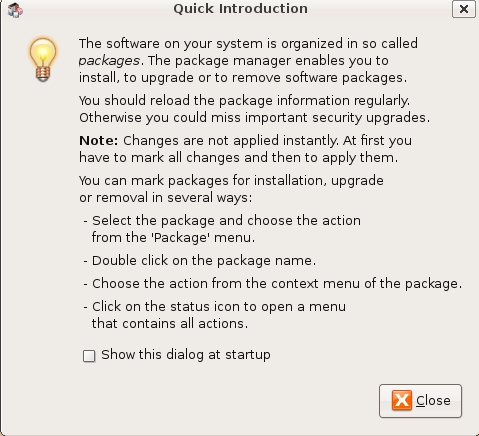
Just click Close and move on.
Let's look at the Synaptic Package Manager interface.
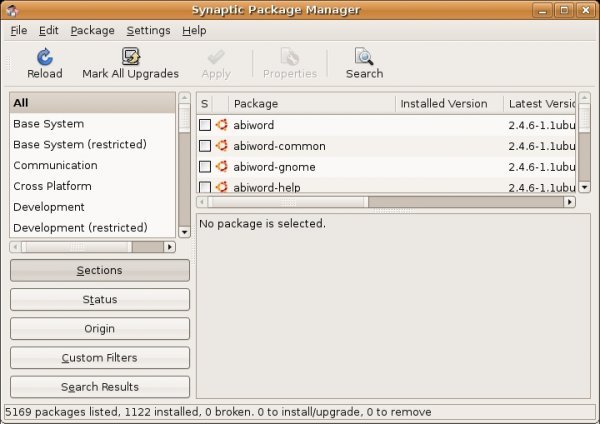
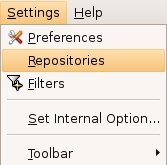
Let's not worry about the details of the interface for now. All we want to do is change the repository settings. To do this, on the Settings menu, click Repositories.
Now we get to where we can do some business. Make sure that all the options are selected:

Now close that window by clicking the big Close button at the bottom right.

Next, you see a warning telling you the repository has changed:
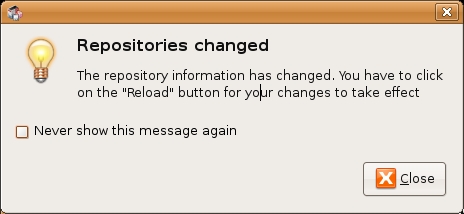
Click the Close button.
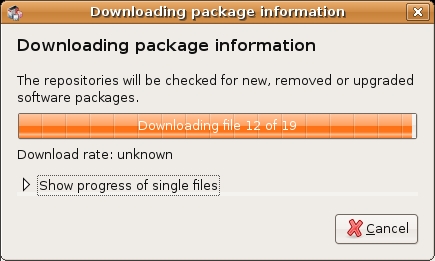
Back in the SPM interface, you need to refresh the repositories as the warning suggests. To do this, click Reload:

You then see a status window saying the repositories are being updated and showing the progress.
Installing Miro
Now we need to install Miro using the package manager.
- In the Synaptic Package Manager, click 'Search'.

- A search window appears:

- Type 'Miro' into the Search field :

- When you click 'Search', a number of results may eventually be displayed:

- Click 'miro' and choose 'Mark for Installation':

- A window asks you to confirm the extra packages (dependencies) that need to be installed:

- Click 'Mark'. The window disappears, and you see the icons in the Synaptic Package Manager change to show that Miro has been selected for installation :

- Click 'Apply' in the main window. A summary window appears:

- Click 'Apply' again and the installation process begins. The following three windows appear (one after the other) :


- Close this window to complete the installation process. You can also close the Synaptic Package Manager.
Starting Miro
Miro is added automagically to the Applications menu. Select its shortcut to start Miro.

If you don't see a shortcut for Miro in the Applications menu, then try restarting your computer.
Installing Miro on Macintosh OS X
Software name : Miro
Homepage : http://www.getmiro.com/
Software version used for this installation : 1.2.8
Operating System used for this installation : Macintosh OS X
Recommended Hardware : 200 MHz processor (CPU) minimum
Downloading Miro
Go to the home page for Miro (http://www.getmiro.com). When you click the green box labeled "Download Miro - Free".

The browser switches to a different page, and a window appears for downloading an installation file.

If this does not happen (or if the installation file is for a different type of computer, such as Microsoft Windows), click "DOWNLOAD" at the top of the page, and then click the "Download Now" link for Mac OS X.
You can choose to either open the file automatically, or save it. If you save it, then you need to find where it was saved, and double-click it to open it.
Installing Miro
When the file is opened, it looks like this:

Drag the Miro icon onto the Applications shortcut. Then double-click the Applications icon, which opens the Applications folder.
Starting Miro
Locate the Miro icon in the Applications folder, and double-click it.

A window asks you to confirm that you want to run Miro. Click "Open".

The Miro software starts running:

Subscribe to Video Podcasts
This chapter details how to subscribe to a Video Channel from an RSS feed from a video sharing site or video blog. Note that you can use Miro to subscribe to video channels that aren't listed in the Miro interface.
We assume that you have used a browser to open a site that has a video podcast available. You need to find out the web address ('URL') of the video podcast or channel. Technically, this is channel called an RSS feed. You find RSS feeds on Video Blogs or news sites. They are normally identified by a graphic which links to a text file. Some sites might refer to it as a 'vodcast'.
The image associated with the channel could be anything. There has been an attempt to standardise the icons related to 'RSS feeds' and it has been somewhat succesful. For example if you see an image like this it indicates an RSS Feed:
However there are no rules and any link or image might be used.
- Once you have found the link, right Click (Ctrl + Click on Mac) it and choose 'Copy Link Location' or 'Copy Shortcut'. This copies the URL into the computer's memory or 'clipboard'.
- Now that you have the URL of the Channel 'in memory', open Miro and copy this information to Miro. To do this, select Channels > Add Channel on the Miro menu bar as shown below:
When the Add Channel box appears, you might see the URL of the channel already in it:
This happens because Miro knows that there is something in the memory of your computer. When you open this box, Miro guesses that what is in memory is probably the URL of a channel.
- If it doesn't appear, then try pressing Ctrl + V (or Apple + V on a Mac) to 'paste' the address of the channel into the box. When the address appears in the "URL" box, click "Create Channel". Miro adds the channel to the list on the left (called the 'sidebar'):
Miro automatically starts updating the list of videos available through this channel. This may take some time depending on how much content is available on the new channel and how fast or slow your Internet connection is.
Viewing Video from a Channel
You can watch video from Miro's channels directly from within Miro. Let's look at how to view a video from the 'Using Miro' channel (it is one of the default channels in Miro when you first install it).
When you open Miro, you may notice on the left is a list of channels, called the sidebar.
You can click on a channel on the left of the screen and the information about that channel appears in the main window. In this picture, we choose 'Using Miro':

Miro automatically updates the videos available on the channel and displays this information on the right.
You can click the image or the "Download" button to start downloading. When you do, the video name changes to orange and an orange dot appears next to the name:

When the film has been downloaded the title and the dot become green:

To start playing the video, click the image:

Playing video full screen
You may wish to view a video so that it uses the entire screen. You can do this in three ways:
- On the main menu, select Playback > Fullscreen.
- On the keyboard, press Ctrl + F or Alt + Enter.

- While the video is playing, click the button to the right of the Play / Pause button.

To exit Fullscreen mode you can press Alt + Enter, Ctrl + F, or the escape key on your keyboard.
Automatic Downloads
If you decide you like a channel in Miro, you can set up Miro to automatically download any new videos that gets published on that channel. In the image below, you can see that AUTO DOWNLOAD is turned off :
If you click the button ('OFF') you get three choices :
- 'ALL': Miro downloads all the videos in a channel.
- 'New': Miro gets new videos published in this channel whenever you start Miro or when you ask Miro to check for new videos.
- 'OFF': Miro does not automatically download videos. You must select each video that you want to download.
Keeping Files
Miro deletes downloaded video files automatically. To keep a video you must specifically tell Miro not to delete it. Do do this, click the 'KEEP' button after you have watched the video. To set how long you want to leave videos before they get deleted, select
File > Options.

Click the 'Disk Space' tab. Select the number of days to keep videos.

Finding Files
If you want to use one of the files you downloaded to put onto CD, iPod or turn into a DVD, you need to know where Miro stores the files it downloads.
Windows
On Microsoft Windows, Miro stores videos inside the 'My Videos' folder. To access them, open Windows Explorer and browse to 'C:\My Documents\My Videos\Miro'.

If you want to change where Miro stores its files, do this:
- On the Miro "File" menu, click "Options". The "Preferences" window opens.
- Click the "Folders" tab.

- Click the "Change" button. A window opens where you can browse for folders on your hard drive.
- Select the folder where you want Miro to start saving files, and click "Choose". The location of the folder you selected is displayed under "Store downloads in this folder".
- Click "Close" to close the "Preferences" window.
Mac OS X
On Mac OS X, Miro stores videos in a "Miro" folder inside the "Movies" folder of your home folder:

Ubuntu
It is a little trickier to find the files under Ubuntu. The files are stored in your 'home folder' in a directory called '.miro'
Sound easy? Well, maybe, except that Ubuntu does not let you see directories that start with a period ('.') unless you first enable this. Ubuntu works like this because it stores a lot of configuration files for software in this kind of directory and it thinks you probably don't want to see hundreds of folders like this every time you look at your home directory.
So how do you then find the Miro files?
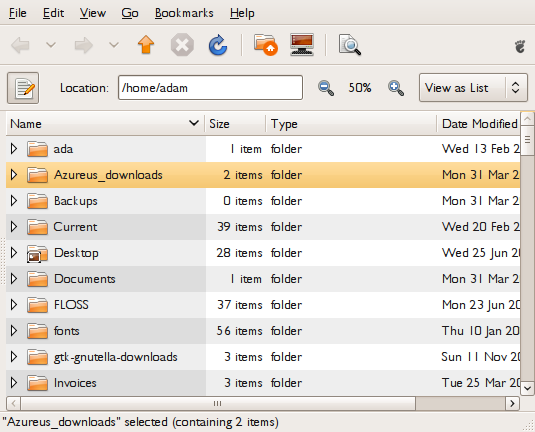
- On the top menu bar of your desktop, click 'Places' and choose 'Home Folder':

This opens a file browser:
- Click 'View' and choose 'Show Hidden Files':

You can see all the files and folders starting with a period. There is likely to be a lot of them.
- Scroll down until you find the '.miro' folder:

- Click the arrow next to the folder to see the contents:

Miro's stores video files under folders named for their channels.
Adding Videos From a Local Drive
You might want use Miro to watch videos that are located on your computer, rather than downloaded from the Internet. They might be on your hard disk drive, or on a removeable drive such as a USB "stick". You can add them to your Miro library so that you can watch them easily, whenever you want.
- On the "File" menu, click "Open".
A window opens to let you select the file.
- Browse to the location where the file is on your local drive, select it, and click "Open". The video immediately begins playing in Miro.
- In the lower left corner of the playback window, click "ADD TO LIBRARY".
The text you just clicked changes to "DELETE". When the video finishes (or you stop it), it appears
- In the Miro sidebar, click "Single Items". The video that you added appears here, because it is not part of a channel.
If you decide you don't want this video in your library any more, click the "Remove" button for the video when it is shown in the right side of the window. A window appears that asks whether you want to completely delete the file, or just remove it from the library. If you want to keep the video on your computer, click "Remove Entry".
Creating Playlists
If you want to do a film screening, or show a series of films, an easy way to set it up is to create a playlist. Using Miro for a presentation or screening is also a great way to promote a fine piece of Free Software.

With a playlist, Miro automatically plays each video in sequence, starting from the first video you play, until it reaches the end of the playlist. So, you can set the first video to be full screen, and then just sit back and watch.
Starting a new playlist
There are two ways to start a new playlist, from the main menu, or from a video.
Starting an empty playlist
To start an empty playlist:
- From the main menu, on the Playlists menu, click New Playlist.

- Enter a name for your playlist and click Create.

Your playlist appears at the bottom of the list of channels on the left of your screen.
Starting a Playlist with a Video
- While you are viewing the listing for a downloaded, video, right-click (or Cmd-click on a Mac) the thumbnail image. A menu pops up.
- Click Add to new playlist on the menu.

Adding videos to your playlist
To add videos to your playlist, drag and drop them from either a channel view or from your Library.

To add a video to a playlist:
- Click the image of your chosen video and drag the mouse pointer over the name of the playlist you want to add it to, in the Miro sidebar. Then release the mouse button when the mouse pointer is over the playlist name and it becomes highlighted.
To re-arrange the order of your playlist, drag and drop videos into the correct order:
- Click and drag the mouse pointer when it is over the Title and description of the video you wish to move. As you move the mouse pointer a dark line appears between the other video listings, indicating where your video will appear when you release the mouse.

Playing playlists
When you have added a few videos to your playlist, they appear in order on the right, when you click the name of the playlist on the bottom left.
You can click the first video and choose full screen mode to enjoy a TV like experience (only without the adverts).

Searching the Web for Videos
You can use Miro to search the World Wide Web for videos that you are interested in, even if they are not in existing Miro channels, and you can save your search as a channel.
There are two ways to access Web search in Miro:
- Click "Video Search" in the sidebar, then type words that describe what you're looking for in the "Video Search" box, and click "Search".
- In the lower left corner of the Miro window, type your search words, and press the "Enter" key.

Miro searches the video-searching Web sites that it knows about, and lists matching videos in the "Video Search" view. (If you used the lower-left search box, Miro switches to the "Video Search" view, from whatever view it was in when you typed your search.)
In the image below, Miro shows videos that match a search for "Ki Aikido". You can download any video by clicking its thumbnail image.

You can also save your search by clicking "Save This Search as a Channel".
When you do, the search appears as a channel in side bar, with a name based on where you searched, and the words you searched for:

Searching Specific Sites
You can search a specific Web site for videos, rather than all sites that Miro knows about.
When using the search box in the lower-left corner of the Miro window:
- Click the icon in the left side of the box. A menu pops up that lists sites to search.

- Click the name of the site you want to search (for example, YouTube).
- Type your search words in the box and press the "Enter" key.
When using the search box in the "Video Search" view:
- Click the triangle next to the box that says "Search All". A menu pops up that lists sites to search.

- Click the name of the site you want to search (for example, YouTube).
- Type your search words in the text box, and click "Search".
License
All chapters copyright of the authors (see below). Unless otherwise stated all chapters in this manual licensed with GNU General Public License version 2
This documentation is free documentation; you can redistribute it and/or modify it under the terms of the GNU General Public License as published by the Free Software Foundation; either version 2 of the License, or (at your option) any later version.
This documentation is distributed in the hope that it will be useful, but WITHOUT ANY WARRANTY; without even the implied warranty of MERCHANTABILITY or FITNESS FOR A PARTICULAR PURPOSE. See the GNU General Public License for more details.
You should have received a copy of the GNU General Public License along with this documentation; if not, write to the Free Software Foundation, Inc., 51 Franklin Street, Fifth Floor, Boston, MA 02110-1301, USA.
Authors
ADDING LOCAL FILES
© Janet Swisher 2008
AUTOMATIC DOWNLOADS
© adam hyde 2008
Modifications:
Janet Swisher 2008
CREATING PLAYLISTS
© adam hyde 2008
Modifications:
Janet Swisher 2008
mick fuzz 2008
CREDITS
© adam hyde 2006, 2007, 2008
Modifications:
mick fuzz 2007
SEARCHING THE WEB
© Janet Swisher 2008
FINDING FILES
© adam hyde 2008
Modifications:
Andrew Lowenthal 2008
Janet Swisher 2008
OSX
© Janet Swisher 2008
UBUNTU
© adam hyde 2007, 2008
Modifications:
Janet Swisher 2008
Matteo Cortese 2008
INTRODUCTION
© adam hyde 2006, 2007, 2008
Modifications:
Andrew Lowenthal 2008
Jakub Misak 2008
mick fuzz 2007
Will Kahn-Greene 2009
KEEPING FILES
© mick fuzz 2007
Modifications:
adam hyde 2008
Janet Swisher 2008
WINDOWS
© mick fuzz 2007
Modifications:
adam hyde 2008
Andrew Lowenthal 2008
Janet Swisher 2008
PLAY FULLSCREEN
© adam hyde 2008
Modifications:
Janet Swisher 2008
PLAYING VIDEO
© mick fuzz 2007
Modifications:
adam hyde 2008
Janet Swisher 2008
ADD A PODCAST
© mick fuzz 2007
Modifications:
adam hyde 2008
Andrew Lowenthal 2008
Janet Swisher 2008

Free manuals for free software
General Public License
Version 2, June 1991
Copyright (C) 1989, 1991 Free Software Foundation, Inc.
51 Franklin Street, Fifth Floor, Boston, MA 02110-1301, USA
Everyone is permitted to copy and distribute verbatim copies
of this license document, but changing it is not allowed.
Preamble
The licenses for most software are designed to take away your freedom to share and change it. By contrast, the GNU General Public License is intended to guarantee your freedom to share and change free software--to make sure the software is free for all its users. This General Public License applies to most of the Free Software Foundation's software and to any other program whose authors commit to using it. (Some other Free Software Foundation software is covered by the GNU Lesser General Public License instead.) You can apply it to your programs, too.
When we speak of free software, we are referring to freedom, not price. Our General Public Licenses are designed to make sure that you have the freedom to distribute copies of free software (and charge for this service if you wish), that you receive source code or can get it if you want it, that you can change the software or use pieces of it in new free programs; and that you know you can do these things.
To protect your rights, we need to make restrictions that forbid anyone to deny you these rights or to ask you to surrender the rights. These restrictions translate to certain responsibilities for you if you distribute copies of the software, or if you modify it.
For example, if you distribute copies of such a program, whether gratis or for a fee, you must give the recipients all the rights that you have. You must make sure that they, too, receive or can get the source code. And you must show them these terms so they know their rights.
We protect your rights with two steps: (1) copyright the software, and (2) offer you this license which gives you legal permission to copy, distribute and/or modify the software.
Also, for each author's protection and ours, we want to make certain that everyone understands that there is no warranty for this free software. If the software is modified by someone else and passed on, we want its recipients to know that what they have is not the original, so that any problems introduced by others will not reflect on the original authors' reputations.
Finally, any free program is threatened constantly by software patents. We wish to avoid the danger that redistributors of a free program will individually obtain patent licenses, in effect making the program proprietary. To prevent this, we have made it clear that any patent must be licensed for everyone's free use or not licensed at all.
The precise terms and conditions for copying, distribution and modification follow.
TERMS AND CONDITIONS FOR COPYING, DISTRIBUTION AND MODIFICATION
0. This License applies to any program or other work which contains a notice placed by the copyright holder saying it may be distributed under the terms of this General Public License. The "Program", below, refers to any such program or work, and a "work based on the Program" means either the Program or any derivative work under copyright law: that is to say, a work containing the Program or a portion of it, either verbatim or with modifications and/or translated into another language. (Hereinafter, translation is included without limitation in the term "modification".) Each licensee is addressed as "you".
Activities other than copying, distribution and modification are not covered by this License; they are outside its scope. The act of running the Program is not restricted, and the output from the Program is covered only if its contents constitute a work based on the Program (independent of having been made by running the Program). Whether that is true depends on what the Program does.
1. You may copy and distribute verbatim copies of the Program's source code as you receive it, in any medium, provided that you conspicuously and appropriately publish on each copy an appropriate copyright notice and disclaimer of warranty; keep intact all the notices that refer to this License and to the absence of any warranty; and give any other recipients of the Program a copy of this License along with the Program.
You may charge a fee for the physical act of transferring a copy, and you may at your option offer warranty protection in exchange for a fee.
2. You may modify your copy or copies of the Program or any portion of it, thus forming a work based on the Program, and copy and distribute such modifications or work under the terms of Section 1 above, provided that you also meet all of these conditions:
- a) You must cause the modified files to carry prominent notices stating that you changed the files and the date of any change.
- b) You must cause any work that you distribute or publish, that in whole or in part contains or is derived from the Program or any part thereof, to be licensed as a whole at no charge to all third parties under the terms of this License.
- c) If the modified program normally reads commands interactively when run, you must cause it, when started running for such interactive use in the most ordinary way, to print or display an announcement including an appropriate copyright notice and a notice that there is no warranty (or else, saying that you provide a warranty) and that users may redistribute the program under these conditions, and telling the user how to view a copy of this License. (Exception: if the Program itself is interactive but does not normally print such an announcement, your work based on the Program is not required to print an announcement.)
These requirements apply to the modified work as a whole. If identifiable sections of that work are not derived from the Program, and can be reasonably considered independent and separate works in themselves, then this License, and its terms, do not apply to those sections when you distribute them as separate works. But when you distribute the same sections as part of a whole which is a work based on the Program, the distribution of the whole must be on the terms of this License, whose permissions for other licensees extend to the entire whole, and thus to each and every part regardless of who wrote it.
Thus, it is not the intent of this section to claim rights or contest your rights to work written entirely by you; rather, the intent is to exercise the right to control the distribution of derivative or collective works based on the Program.
In addition, mere aggregation of another work not based on the Program with the Program (or with a work based on the Program) on a volume of a storage or distribution medium does not bring the other work under the scope of this License.
3. You may copy and distribute the Program (or a work based on it, under Section 2) in object code or executable form under the terms of Sections 1 and 2 above provided that you also do one of the following:
- a) Accompany it with the complete corresponding machine-readable source code, which must be distributed under the terms of Sections 1 and 2 above on a medium customarily used for software interchange; or,
- b) Accompany it with a written offer, valid for at least three years, to give any third party, for a charge no more than your cost of physically performing source distribution, a complete machine-readable copy of the corresponding source code, to be distributed under the terms of Sections 1 and 2 above on a medium customarily used for software interchange; or,
- c) Accompany it with the information you received as to the offer to distribute corresponding source code. (This alternative is allowed only for noncommercial distribution and only if you received the program in object code or executable form with such an offer, in accord with Subsection b above.)
The source code for a work means the preferred form of the work for making modifications to it. For an executable work, complete source code means all the source code for all modules it contains, plus any associated interface definition files, plus the scripts used to control compilation and installation of the executable. However, as a special exception, the source code distributed need not include anything that is normally distributed (in either source or binary form) with the major components (compiler, kernel, and so on) of the operating system on which the executable runs, unless that component itself accompanies the executable.
If distribution of executable or object code is made by offering access to copy from a designated place, then offering equivalent access to copy the source code from the same place counts as distribution of the source code, even though third parties are not compelled to copy the source along with the object code.
4. You may not copy, modify, sublicense, or distribute the Program except as expressly provided under this License. Any attempt otherwise to copy, modify, sublicense or distribute the Program is void, and will automatically terminate your rights under this License. However, parties who have received copies, or rights, from you under this License will not have their licenses terminated so long as such parties remain in full compliance.
5. You are not required to accept this License, since you have not signed it. However, nothing else grants you permission to modify or distribute the Program or its derivative works. These actions are prohibited by law if you do not accept this License. Therefore, by modifying or distributing the Program (or any work based on the Program), you indicate your acceptance of this License to do so, and all its terms and conditions for copying, distributing or modifying the Program or works based on it.
6. Each time you redistribute the Program (or any work based on the Program), the recipient automatically receives a license from the original licensor to copy, distribute or modify the Program subject to these terms and conditions. You may not impose any further restrictions on the recipients' exercise of the rights granted herein. You are not responsible for enforcing compliance by third parties to this License.
7. If, as a consequence of a court judgment or allegation of patent infringement or for any other reason (not limited to patent issues), conditions are imposed on you (whether by court order, agreement or otherwise) that contradict the conditions of this License, they do not excuse you from the conditions of this License. If you cannot distribute so as to satisfy simultaneously your obligations under this License and any other pertinent obligations, then as a consequence you may not distribute the Program at all. For example, if a patent license would not permit royalty-free redistribution of the Program by all those who receive copies directly or indirectly through you, then the only way you could satisfy both it and this License would be to refrain entirely from distribution of the Program.
If any portion of this section is held invalid or unenforceable under any particular circumstance, the balance of the section is intended to apply and the section as a whole is intended to apply in other circumstances.
It is not the purpose of this section to induce you to infringe any patents or other property right claims or to contest validity of any such claims; this section has the sole purpose of protecting the integrity of the free software distribution system, which is implemented by public license practices. Many people have made generous contributions to the wide range of software distributed through that system in reliance on consistent application of that system; it is up to the author/donor to decide if he or she is willing to distribute software through any other system and a licensee cannot impose that choice.
This section is intended to make thoroughly clear what is believed to be a consequence of the rest of this License.
8. If the distribution and/or use of the Program is restricted in certain countries either by patents or by copyrighted interfaces, the original copyright holder who places the Program under this License may add an explicit geographical distribution limitation excluding those countries, so that distribution is permitted only in or among countries not thus excluded. In such case, this License incorporates the limitation as if written in the body of this License.
9. The Free Software Foundation may publish revised and/or new versions of the General Public License from time to time. Such new versions will be similar in spirit to the present version, but may differ in detail to address new problems or concerns.
Each version is given a distinguishing version number. If the Program specifies a version number of this License which applies to it and "any later version", you have the option of following the terms and conditions either of that version or of any later version published by the Free Software Foundation. If the Program does not specify a version number of this License, you may choose any version ever published by the Free Software Foundation.
10. If you wish to incorporate parts of the Program into other free programs whose distribution conditions are different, write to the author to ask for permission. For software which is copyrighted by the Free Software Foundation, write to the Free Software Foundation; we sometimes make exceptions for this. Our decision will be guided by the two goals of preserving the free status of all derivatives of our free software and of promoting the sharing and reuse of software generally.
NO WARRANTY
11. BECAUSE THE PROGRAM IS LICENSED FREE OF CHARGE, THERE IS NO WARRANTY FOR THE PROGRAM, TO THE EXTENT PERMITTED BY APPLICABLE LAW. EXCEPT WHEN OTHERWISE STATED IN WRITING THE COPYRIGHT HOLDERS AND/OR OTHER PARTIES PROVIDE THE PROGRAM "AS IS" WITHOUT WARRANTY OF ANY KIND, EITHER EXPRESSED OR IMPLIED, INCLUDING, BUT NOT LIMITED TO, THE IMPLIED WARRANTIES OF MERCHANTABILITY AND FITNESS FOR A PARTICULAR PURPOSE. THE ENTIRE RISK AS TO THE QUALITY AND PERFORMANCE OF THE PROGRAM IS WITH YOU. SHOULD THE PROGRAM PROVE DEFECTIVE, YOU ASSUME THE COST OF ALL NECESSARY SERVICING, REPAIR OR CORRECTION.
12. IN NO EVENT UNLESS REQUIRED BY APPLICABLE LAW OR AGREED TO IN WRITING WILL ANY COPYRIGHT HOLDER, OR ANY OTHER PARTY WHO MAY MODIFY AND/OR REDISTRIBUTE THE PROGRAM AS PERMITTED ABOVE, BE LIABLE TO YOU FOR DAMAGES, INCLUDING ANY GENERAL, SPECIAL, INCIDENTAL OR CONSEQUENTIAL DAMAGES ARISING OUT OF THE USE OR INABILITY TO USE THE PROGRAM (INCLUDING BUT NOT LIMITED TO LOSS OF DATA OR DATA BEING RENDERED INACCURATE OR LOSSES SUSTAINED BY YOU OR THIRD PARTIES OR A FAILURE OF THE PROGRAM TO OPERATE WITH ANY OTHER PROGRAMS), EVEN IF SUCH HOLDER OR OTHER PARTY HAS BEEN ADVISED OF THE POSSIBILITY OF SUCH DAMAGES.
END OF TERMS AND CONDITIONS
Creating Playlists
If you want to do a film screening, or show a series of films, an easy way to set it up is to create a playlist. Using Miro for a presentation or screening is also a great way to promote a fine piece of Free Software.
With a playlist, Miro automatically plays each video in sequence, starting from the first video you play, until it reaches the end of the playlist. So, you can set the first video to be full screen, and then just sit back and watch.
Starting a new playlist
There are two ways to start a new playlist, from the main menu, or from a video.
Starting an empty playlist
To start an empty playlist:
- From the main menu, on the Playlists menu, click New Playlist.
- Enter a name for your playlist and click Create.
Your playlist appears at the bottom of the list of channels on the left of your screen.
Starting a Playlist with a Video
- While you are viewing the listing for a downloaded, video, right-click (or Cmd-click on a Mac) the thumbnail image. A menu pops up.
- Click Add to new playlist on the menu.
Adding videos to your playlist
To add videos to your playlist, drag and drop them from either a channel view or from your Library.
To add a video to a playlist:
- Click the image of your chosen video and drag the mouse pointer over the name of the playlist you want to add it to, in the Miro sidebar. Then release the mouse button when the mouse pointer is over the playlist name and it becomes highlighted.
To re-arrange the order of your playlist, drag and drop videos into the correct order:
- Click and drag the mouse pointer when it is over the Title and description of the video you wish to move. As you move the mouse pointer a dark line appears between the other video listings, indicating where your video will appear when you release the mouse.
Playing playlists
When you have added a few videos to your playlist, they appear in order on the right, when you click the name of the playlist on the bottom left.
You can click the first video and choose full screen mode to enjoy a TV like experience (only without the adverts).
License
All chapters copyright of the authors (see below). Unless otherwise stated all chapters in this manual licensed with GNU General Public License version 2
This documentation is free documentation; you can redistribute it and/or modify it under the terms of the GNU General Public License as published by the Free Software Foundation; either version 2 of the License, or (at your option) any later version.
This documentation is distributed in the hope that it will be useful, but WITHOUT ANY WARRANTY; without even the implied warranty of MERCHANTABILITY or FITNESS FOR A PARTICULAR PURPOSE. See the GNU General Public License for more details.
You should have received a copy of the GNU General Public License along with this documentation; if not, write to the Free Software Foundation, Inc., 51 Franklin Street, Fifth Floor, Boston, MA 02110-1301, USA.
Authors
ADDING LOCAL FILES
© Janet Swisher 2008
AUTOMATIC DOWNLOADS
© adam hyde 2008
Modifications:
Janet Swisher 2008
CREATING PLAYLISTS
© adam hyde 2008
Modifications:
Janet Swisher 2008
mick fuzz 2008
CREDITS
© adam hyde 2006, 2007, 2008
Modifications:
mick fuzz 2007
SEARCHING THE WEB
© Janet Swisher 2008
FINDING FILES
© adam hyde 2008
Modifications:
Andrew Lowenthal 2008
Janet Swisher 2008
OSX
© Janet Swisher 2008
UBUNTU
© adam hyde 2007, 2008
Modifications:
Janet Swisher 2008
Matteo Cortese 2008
INTRODUCTION
© adam hyde 2006, 2007, 2008
Modifications:
Andrew Lowenthal 2008
Jakub Misak 2008
mick fuzz 2007
Will Kahn-Greene 2009
KEEPING FILES
© mick fuzz 2007
Modifications:
adam hyde 2008
Janet Swisher 2008
WINDOWS
© mick fuzz 2007
Modifications:
adam hyde 2008
Andrew Lowenthal 2008
Janet Swisher 2008
PLAY FULLSCREEN
© adam hyde 2008
Modifications:
Janet Swisher 2008
PLAYING VIDEO
© mick fuzz 2007
Modifications:
adam hyde 2008
Janet Swisher 2008
ADD A PODCAST
© mick fuzz 2007
Modifications:
adam hyde 2008
Andrew Lowenthal 2008
Janet Swisher 2008
Free manuals for free software
General Public License
Version 2, June 1991
Copyright (C) 1989, 1991 Free Software Foundation, Inc.
51 Franklin Street, Fifth Floor, Boston, MA 02110-1301, USA
Everyone is permitted to copy and distribute verbatim copies
of this license document, but changing it is not allowed.
Preamble
The licenses for most software are designed to take away your freedom to share and change it. By contrast, the GNU General Public License is intended to guarantee your freedom to share and change free software--to make sure the software is free for all its users. This General Public License applies to most of the Free Software Foundation's software and to any other program whose authors commit to using it. (Some other Free Software Foundation software is covered by the GNU Lesser General Public License instead.) You can apply it to your programs, too.
When we speak of free software, we are referring to freedom, not price. Our General Public Licenses are designed to make sure that you have the freedom to distribute copies of free software (and charge for this service if you wish), that you receive source code or can get it if you want it, that you can change the software or use pieces of it in new free programs; and that you know you can do these things.
To protect your rights, we need to make restrictions that forbid anyone to deny you these rights or to ask you to surrender the rights. These restrictions translate to certain responsibilities for you if you distribute copies of the software, or if you modify it.
For example, if you distribute copies of such a program, whether gratis or for a fee, you must give the recipients all the rights that you have. You must make sure that they, too, receive or can get the source code. And you must show them these terms so they know their rights.
We protect your rights with two steps: (1) copyright the software, and (2) offer you this license which gives you legal permission to copy, distribute and/or modify the software.
Also, for each author's protection and ours, we want to make certain that everyone understands that there is no warranty for this free software. If the software is modified by someone else and passed on, we want its recipients to know that what they have is not the original, so that any problems introduced by others will not reflect on the original authors' reputations.
Finally, any free program is threatened constantly by software patents. We wish to avoid the danger that redistributors of a free program will individually obtain patent licenses, in effect making the program proprietary. To prevent this, we have made it clear that any patent must be licensed for everyone's free use or not licensed at all.
The precise terms and conditions for copying, distribution and modification follow.
TERMS AND CONDITIONS FOR COPYING, DISTRIBUTION AND MODIFICATION
0. This License applies to any program or other work which contains a notice placed by the copyright holder saying it may be distributed under the terms of this General Public License. The "Program", below, refers to any such program or work, and a "work based on the Program" means either the Program or any derivative work under copyright law: that is to say, a work containing the Program or a portion of it, either verbatim or with modifications and/or translated into another language. (Hereinafter, translation is included without limitation in the term "modification".) Each licensee is addressed as "you".
Activities other than copying, distribution and modification are not covered by this License; they are outside its scope. The act of running the Program is not restricted, and the output from the Program is covered only if its contents constitute a work based on the Program (independent of having been made by running the Program). Whether that is true depends on what the Program does.
1. You may copy and distribute verbatim copies of the Program's source code as you receive it, in any medium, provided that you conspicuously and appropriately publish on each copy an appropriate copyright notice and disclaimer of warranty; keep intact all the notices that refer to this License and to the absence of any warranty; and give any other recipients of the Program a copy of this License along with the Program.
You may charge a fee for the physical act of transferring a copy, and you may at your option offer warranty protection in exchange for a fee.
2. You may modify your copy or copies of the Program or any portion of it, thus forming a work based on the Program, and copy and distribute such modifications or work under the terms of Section 1 above, provided that you also meet all of these conditions:
- a) You must cause the modified files to carry prominent notices stating that you changed the files and the date of any change.
- b) You must cause any work that you distribute or publish, that in whole or in part contains or is derived from the Program or any part thereof, to be licensed as a whole at no charge to all third parties under the terms of this License.
- c) If the modified program normally reads commands interactively when run, you must cause it, when started running for such interactive use in the most ordinary way, to print or display an announcement including an appropriate copyright notice and a notice that there is no warranty (or else, saying that you provide a warranty) and that users may redistribute the program under these conditions, and telling the user how to view a copy of this License. (Exception: if the Program itself is interactive but does not normally print such an announcement, your work based on the Program is not required to print an announcement.)
These requirements apply to the modified work as a whole. If identifiable sections of that work are not derived from the Program, and can be reasonably considered independent and separate works in themselves, then this License, and its terms, do not apply to those sections when you distribute them as separate works. But when you distribute the same sections as part of a whole which is a work based on the Program, the distribution of the whole must be on the terms of this License, whose permissions for other licensees extend to the entire whole, and thus to each and every part regardless of who wrote it.
Thus, it is not the intent of this section to claim rights or contest your rights to work written entirely by you; rather, the intent is to exercise the right to control the distribution of derivative or collective works based on the Program.
In addition, mere aggregation of another work not based on the Program with the Program (or with a work based on the Program) on a volume of a storage or distribution medium does not bring the other work under the scope of this License.
3. You may copy and distribute the Program (or a work based on it, under Section 2) in object code or executable form under the terms of Sections 1 and 2 above provided that you also do one of the following:
- a) Accompany it with the complete corresponding machine-readable source code, which must be distributed under the terms of Sections 1 and 2 above on a medium customarily used for software interchange; or,
- b) Accompany it with a written offer, valid for at least three years, to give any third party, for a charge no more than your cost of physically performing source distribution, a complete machine-readable copy of the corresponding source code, to be distributed under the terms of Sections 1 and 2 above on a medium customarily used for software interchange; or,
- c) Accompany it with the information you received as to the offer to distribute corresponding source code. (This alternative is allowed only for noncommercial distribution and only if you received the program in object code or executable form with such an offer, in accord with Subsection b above.)
The source code for a work means the preferred form of the work for making modifications to it. For an executable work, complete source code means all the source code for all modules it contains, plus any associated interface definition files, plus the scripts used to control compilation and installation of the executable. However, as a special exception, the source code distributed need not include anything that is normally distributed (in either source or binary form) with the major components (compiler, kernel, and so on) of the operating system on which the executable runs, unless that component itself accompanies the executable.
If distribution of executable or object code is made by offering access to copy from a designated place, then offering equivalent access to copy the source code from the same place counts as distribution of the source code, even though third parties are not compelled to copy the source along with the object code.
4. You may not copy, modify, sublicense, or distribute the Program except as expressly provided under this License. Any attempt otherwise to copy, modify, sublicense or distribute the Program is void, and will automatically terminate your rights under this License. However, parties who have received copies, or rights, from you under this License will not have their licenses terminated so long as such parties remain in full compliance.
5. You are not required to accept this License, since you have not signed it. However, nothing else grants you permission to modify or distribute the Program or its derivative works. These actions are prohibited by law if you do not accept this License. Therefore, by modifying or distributing the Program (or any work based on the Program), you indicate your acceptance of this License to do so, and all its terms and conditions for copying, distributing or modifying the Program or works based on it.
6. Each time you redistribute the Program (or any work based on the Program), the recipient automatically receives a license from the original licensor to copy, distribute or modify the Program subject to these terms and conditions. You may not impose any further restrictions on the recipients' exercise of the rights granted herein. You are not responsible for enforcing compliance by third parties to this License.
7. If, as a consequence of a court judgment or allegation of patent infringement or for any other reason (not limited to patent issues), conditions are imposed on you (whether by court order, agreement or otherwise) that contradict the conditions of this License, they do not excuse you from the conditions of this License. If you cannot distribute so as to satisfy simultaneously your obligations under this License and any other pertinent obligations, then as a consequence you may not distribute the Program at all. For example, if a patent license would not permit royalty-free redistribution of the Program by all those who receive copies directly or indirectly through you, then the only way you could satisfy both it and this License would be to refrain entirely from distribution of the Program.
If any portion of this section is held invalid or unenforceable under any particular circumstance, the balance of the section is intended to apply and the section as a whole is intended to apply in other circumstances.
It is not the purpose of this section to induce you to infringe any patents or other property right claims or to contest validity of any such claims; this section has the sole purpose of protecting the integrity of the free software distribution system, which is implemented by public license practices. Many people have made generous contributions to the wide range of software distributed through that system in reliance on consistent application of that system; it is up to the author/donor to decide if he or she is willing to distribute software through any other system and a licensee cannot impose that choice.
This section is intended to make thoroughly clear what is believed to be a consequence of the rest of this License.
8. If the distribution and/or use of the Program is restricted in certain countries either by patents or by copyrighted interfaces, the original copyright holder who places the Program under this License may add an explicit geographical distribution limitation excluding those countries, so that distribution is permitted only in or among countries not thus excluded. In such case, this License incorporates the limitation as if written in the body of this License.
9. The Free Software Foundation may publish revised and/or new versions of the General Public License from time to time. Such new versions will be similar in spirit to the present version, but may differ in detail to address new problems or concerns.
Each version is given a distinguishing version number. If the Program specifies a version number of this License which applies to it and "any later version", you have the option of following the terms and conditions either of that version or of any later version published by the Free Software Foundation. If the Program does not specify a version number of this License, you may choose any version ever published by the Free Software Foundation.
10. If you wish to incorporate parts of the Program into other free programs whose distribution conditions are different, write to the author to ask for permission. For software which is copyrighted by the Free Software Foundation, write to the Free Software Foundation; we sometimes make exceptions for this. Our decision will be guided by the two goals of preserving the free status of all derivatives of our free software and of promoting the sharing and reuse of software generally.
NO WARRANTY
11. BECAUSE THE PROGRAM IS LICENSED FREE OF CHARGE, THERE IS NO WARRANTY FOR THE PROGRAM, TO THE EXTENT PERMITTED BY APPLICABLE LAW. EXCEPT WHEN OTHERWISE STATED IN WRITING THE COPYRIGHT HOLDERS AND/OR OTHER PARTIES PROVIDE THE PROGRAM "AS IS" WITHOUT WARRANTY OF ANY KIND, EITHER EXPRESSED OR IMPLIED, INCLUDING, BUT NOT LIMITED TO, THE IMPLIED WARRANTIES OF MERCHANTABILITY AND FITNESS FOR A PARTICULAR PURPOSE. THE ENTIRE RISK AS TO THE QUALITY AND PERFORMANCE OF THE PROGRAM IS WITH YOU. SHOULD THE PROGRAM PROVE DEFECTIVE, YOU ASSUME THE COST OF ALL NECESSARY SERVICING, REPAIR OR CORRECTION.
12. IN NO EVENT UNLESS REQUIRED BY APPLICABLE LAW OR AGREED TO IN WRITING WILL ANY COPYRIGHT HOLDER, OR ANY OTHER PARTY WHO MAY MODIFY AND/OR REDISTRIBUTE THE PROGRAM AS PERMITTED ABOVE, BE LIABLE TO YOU FOR DAMAGES, INCLUDING ANY GENERAL, SPECIAL, INCIDENTAL OR CONSEQUENTIAL DAMAGES ARISING OUT OF THE USE OR INABILITY TO USE THE PROGRAM (INCLUDING BUT NOT LIMITED TO LOSS OF DATA OR DATA BEING RENDERED INACCURATE OR LOSSES SUSTAINED BY YOU OR THIRD PARTIES OR A FAILURE OF THE PROGRAM TO OPERATE WITH ANY OTHER PROGRAMS), EVEN IF SUCH HOLDER OR OTHER PARTY HAS BEEN ADVISED OF THE POSSIBILITY OF SUCH DAMAGES.
END OF TERMS AND CONDITIONS
Finding Files
If you want to use one of the files you downloaded to put onto CD, iPod or turn into a DVD, you need to know where Miro stores the files it downloads.
Windows
On Microsoft Windows, Miro stores videos inside the 'My Videos' folder. To access them, open Windows Explorer and browse to 'C:\My Documents\My Videos\Miro'.
If you want to change where Miro stores its files, do this:
- On the Miro "File" menu, click "Options". The "Preferences" window opens.
- Click the "Folders" tab.
- Click the "Change" button. A window opens where you can browse for folders on your hard drive.
- Select the folder where you want Miro to start saving files, and click "Choose". The location of the folder you selected is displayed under "Store downloads in this folder".
- Click "Close" to close the "Preferences" window.
Mac OS X
On Mac OS X, Miro stores videos in a "Miro" folder inside the "Movies" folder of your home folder:
Ubuntu
It is a little trickier to find the files under Ubuntu. The files are stored in your 'home folder' in a directory called '.miro'
Sound easy? Well, maybe, except that Ubuntu does not let you see directories that start with a period ('.') unless you first enable this. Ubuntu works like this because it stores a lot of configuration files for software in this kind of directory and it thinks you probably don't want to see hundreds of folders like this every time you look at your home directory.
So how do you then find the Miro files?
- On the top menu bar of your desktop, click 'Places' and choose 'Home Folder':
This opens a file browser:
- Click 'View' and choose 'Show Hidden Files':
You can see all the files and folders starting with a period. There is likely to be a lot of them.
- Scroll down until you find the '.miro' folder:
- Click the arrow next to the folder to see the contents:
Miro's stores video files under folders named for their channels.
Keeping Files
Miro deletes downloaded video files automatically. To keep a video you must specifically tell Miro not to delete it. Do do this, click the 'KEEP' button after you have watched the video. To set how long you want to leave videos before they get deleted, select
File > Options.
Click the 'Disk Space' tab. Select the number of days to keep videos.
Installing Miro on Macintosh OS X
Software name : Miro
Homepage : http://www.getmiro.com/
Software version used for this installation : 1.2.8
Operating System used for this installation : Macintosh OS X
Recommended Hardware : 200 MHz processor (CPU) minimum
Downloading Miro
Go to the home page for Miro (http://www.getmiro.com). When you click the green box labeled "Download Miro - Free".
The browser switches to a different page, and a window appears for downloading an installation file.
If this does not happen (or if the installation file is for a different type of computer, such as Microsoft Windows), click "DOWNLOAD" at the top of the page, and then click the "Download Now" link for Mac OS X.
You can choose to either open the file automatically, or save it. If you save it, then you need to find where it was saved, and double-click it to open it.
Installing Miro
When the file is opened, it looks like this:
Drag the Miro icon onto the Applications shortcut. Then double-click the Applications icon, which opens the Applications folder.
Starting Miro
Locate the Miro icon in the Applications folder, and double-click it.
A window asks you to confirm that you want to run Miro. Click "Open".
The Miro software starts running:
Playing video full screen
You may wish to view a video so that it uses the entire screen. You can do this in three ways:
- On the main menu, select Playback > Fullscreen.
- On the keyboard, press Ctrl + F or Alt + Enter.
- While the video is playing, click the button to the right of the Play / Pause button.
To exit Fullscreen mode you can press Alt + Enter, Ctrl + F, or the escape key on your keyboard.
Viewing Video from a Channel
You can watch video from Miro's channels directly from within Miro. Let's look at how to view a video from the 'Using Miro' channel (it is one of the default channels in Miro when you first install it).
When you open Miro, you may notice on the left is a list of channels, called the sidebar.
You can click on a channel on the left of the screen and the information about that channel appears in the main window. In this picture, we choose 'Using Miro':
Miro automatically updates the videos available on the channel and displays this information on the right.
You can click the image or the "Download" button to start downloading. When you do, the video name changes to orange and an orange dot appears next to the name:
When the film has been downloaded the title and the dot become green:
To start playing the video, click the image:
Searching the Web for Videos
You can use Miro to search the World Wide Web for videos that you are interested in, even if they are not in existing Miro channels, and you can save your search as a channel.
There are two ways to access Web search in Miro:
- Click "Video Search" in the sidebar, then type words that describe what you're looking for in the "Video Search" box, and click "Search".
- In the lower left corner of the Miro window, type your search words, and press the "Enter" key.
Miro searches the video-searching Web sites that it knows about, and lists matching videos in the "Video Search" view. (If you used the lower-left search box, Miro switches to the "Video Search" view, from whatever view it was in when you typed your search.)
In the image below, Miro shows videos that match a search for "Ki Aikido". You can download any video by clicking its thumbnail image.
You can also save your search by clicking "Save This Search as a Channel".
When you do, the search appears as a channel in side bar, with a name based on where you searched, and the words you searched for:
Searching Specific Sites
You can search a specific Web site for videos, rather than all sites that Miro knows about.
When using the search box in the lower-left corner of the Miro window:
- Click the icon in the left side of the box. A menu pops up that lists sites to search.
- Click the name of the site you want to search (for example, YouTube).
- Type your search words in the box and press the "Enter" key.
When using the search box in the "Video Search" view:
- Click the triangle next to the box that says "Search All". A menu pops up that lists sites to search.
- Click the name of the site you want to search (for example, YouTube).
- Type your search words in the text box, and click "Search".
Installing Miro on Ubuntu
Software name : Miro
Homepage : http://www.getmiro.com/
Software version used for this installation : 1.2.8
Operating System used for this installation : Ubuntu 8.04 (Hardy)
Recommended Hardware : 200 MHz processor (CPU) minimum
To install Miro on Ubuntu, you need to know a little about the Synaptic Package Manager. If you already know about the package manager, then skip to the section "Installing Miro".
Synaptic Package Manager
The Synaptic Package Manager (SPM) is used for more than just installing software. It can also upgrade your entire operating system, and manage all software installed on your computer. However most people use SPM for just installing new software. Before you embark on this process, there are a few concepts that you may wish to get familiar with. It's not crucial you understand them thoroughly, so just read the explanations and then let it soak in over time. The ideas behind SPM will become clearer with use.
What is a repository?
SPM can automate the installation of software on your computer because it has a direct connection to one or more online software repositories. These repositories are vast archives of programs that have been pre-configured for installation on your operating system. When your computer is online, SPM can connect to these archives, check what software is available for installation, and present you with a list of installable software. All you have to do is select the software from the list that you want. SPM then downloads the software from the repository and takes care of the installation process.
So SPM is actually a repository manager: it manages which repositories (there are many) you wish to access, and which programs to download and install from those repositories.
SPM allows you to choose which repositories it accesses through its settings. The default repositories used by Ubuntu can be extended through the SPM settings so you can access a wider range of programs. Ubuntu calls each repository by a simple name. They are: Main, Universe, Multiverse, Restricted. By default Ubuntu only uses the Main online repository. If you wish to access you the other repositories, you must do this by changing repository settings of SPM.
What is a package?
When SPM downloads a programs for installation, it is in the form known as a 'package'. This means that it is a compressed archive of the program, pre-configured so that it can install nicely on your computer. If the package has been configured nicely (and the Ubuntu project team spends a lot of time making sure this is the case), then many of the headaches that installing software can bring are taken away — it's the aspirin of software installation. One of the biggest issues with installing software on any form of Linux (Ubuntu is one of many types of Linux), is dependencies. Dependencies are all the other packages required by a particular package. If, for example, I want to install an audio editor, that audio editor software may use some functionality of other programs to do its job.
SPM takes the (often) dark art of dependencies away from you, and manages this itself. So if you wish to install a program and it has dependencies (and the list can be long), you don't have to work this out yourself. SPM knows already what is needed, finds it, and installs it along with the software you have chosen.
So, SPM, as well as managing which repositories you access, is also a package management software. Hence the name: Synaptic Package Manager.
apt
You don't really need to know about 'apt', so if you are on the verge of being confused then don't read this short section. If you are a geek wannabe, then read on.
Ubuntu is a form of Linux that has derived from another form of Linux called Debian. This family of Linux has in common (amongst other things) the package/repository management system. Both Ubuntu and Debian use the apt system for managing packages. APT is an acronym for Advanced Package Tool.
SPM is actually a 'front end' (graphical interface) for controlling 'apt'. So SPM is the nice user interface that you see, but the real work is done by 'apt'. There are other ways of managing 'apt', such as the command line interface known as apt-get. In the world of Linux, there are many varieties of Linux users and they have their own ways of doing things. In general it's safe to say most Debian users use apt-get, and most Ubuntu users are happier using SPM.
Configuring Synaptic Package Manager
To install most software on Ubuntu, you need to change the default repository settings of SPM, because many programs are not contained in the default repository. To do this, you need to open the Synaptic Package Manager, which you can do via the System menu. If you haven't changed the default Desktop of Ubuntu, then the System menu can be accessed at the top left of your screen:
If all is good, you are prompted for a password.
Here you must enter your password (the same one you use to log into the system). If you don't know the password, then you have a problem and it's probably caused by the fact that the computer you are using is not yours. In this case you have to find the computer's owners and ask them for the password (which is usually not polite unless you know them well) or ask them to input the password while you look casually in the other direction.
Assuming the password entered is correct, you now see the SPM open in front of you. It may be that you first see the following 'Quick Introduction' (which appears if you haven't used SPM before).
Just click Close and move on.
Let's look at the Synaptic Package Manager interface.
Let's not worry about the details of the interface for now. All we want to do is change the repository settings. To do this, on the Settings menu, click Repositories.
Now we get to where we can do some business. Make sure that all the options are selected:
Now close that window by clicking the big Close button at the bottom right.
Next, you see a warning telling you the repository has changed:
Click the Close button.
Back in the SPM interface, you need to refresh the repositories as the warning suggests. To do this, click Reload:
You then see a status window saying the repositories are being updated and showing the progress.
Installing Miro
Now we need to install Miro using the package manager.
- In the Synaptic Package Manager, click 'Search'.
- A search window appears:
- Type 'Miro' into the Search field :
- When you click 'Search', a number of results may eventually be displayed:
- Click 'miro' and choose 'Mark for Installation':
- A window asks you to confirm the extra packages (dependencies) that need to be installed:
- Click 'Mark'. The window disappears, and you see the icons in the Synaptic Package Manager change to show that Miro has been selected for installation :
- Click 'Apply' in the main window. A summary window appears:
- Click 'Apply' again and the installation process begins. The following three windows appear (one after the other) :
- Close this window to complete the installation process. You can also close the Synaptic Package Manager.
Starting Miro
Miro is added automagically to the Applications menu. Select its shortcut to start Miro.
If you don't see a shortcut for Miro in the Applications menu, then try restarting your computer.
Windows Installation
Software name : Miro
Homepage : http://www.getmiro.com/
Software version used for this installation : 1.2.8
Operating System used for this installation : Microsoft Windows (XP)
Recommended Hardware : 200 MHz processor (CPU) minimum
Go to the home page for Miro (http://www.getmiro.com) and the page should recognise your operating system and offer you to the relevant download option in the green download box.
If this is not the correct version — for example if you are using a Windows computer and it suggests a download for Mac — you can select the download tab in the top menu.
Otherwise, if it is the right version, click on the green box and you are asked to download Miro:
You are offered to save the file on your computer (or your browser may be set up to download it automatically to your Desktop or a folder you have chosen). If you are presented with the above window, then clicking "Save File" leads you to a file browser.
Choose a location to download your Miro install file to and click"Save". When the file has been downloaded, browse to where the file has been downloaded and double-click it. This causes an installer window to appear:
The installer shows a list of fifteen or so languages. Choose the language that you want to use for the application menus and messages, and click "OK".
Follow these steps to proceed through the setup program:
- On the "Welcome to Miro" setup page, choose either "Easy Install" or "Custom Install", and click "Next".
- If you chose "Custom Install", you can choose options on the following screens. If you are unsure about any option, you can accept the default options that are already selected. On each screen, click "Next" after you have chosen options.
- On the "Choose Components" screen, select the boxes for the components of Miro that you want to be installed.
- On the "Choose Install Location" screen, specify where on your computer to install Miro's files.
- On the "Choose a Start Menu" screen, specify a folder on your Start Menu for Miro's shortcuts. Click "Install".
A progress bar appears while the setup program installs files on your computer.
- The setup program may offer to install other software. These programs are other free, libre open source applications. Choose an option for whether to install this software, and click "Next".
- If you want to run Miro right away, leave the "Run Miro" box selected. Otherwise, clear the box. Click "Finish" to end the setup program.
Running Miro for the First Time
The first time that you run Miro, you see the "Miro First Time Setup" window.
- If you want Miro to run whenever your computer starts, leave "Yes" selected. Otherwise, select "No". Click "Next".
- Choose one of the following options:
- If you want Miro to look for video files that are already on your computer, leave "Yes" selected. If you keep your video files in a location that is not typical, select "Search custom folder" and click "Change", which opens a file browser so you can select your video folder. Click "Finish" when Miro is done searching for files.
- If you don't want Miro to look for video files, select "No" and click "Finish".
Once you click "Finish", Miro starts for the first time.