
Obscuring Photos
To start the process of taking and obscuring photos start the ObscuraCam app on your Android device.
After installing you should find an icon to start ObscuraCam in one of your applications pages.
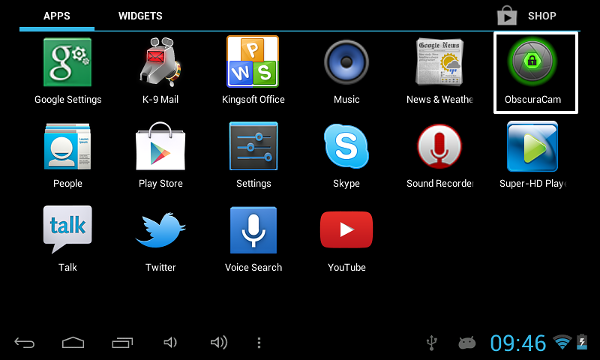
Select/ touch the icon to start.
Obscuring a new picture
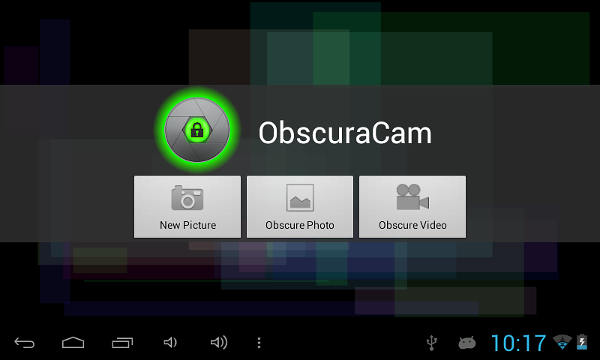
To take a picture using the inbuilt camera of your device start the app and select New Picture.
You should see the default layout of your camera phone's app with some slight alterations.
For this device you click on the round button to take a photo.
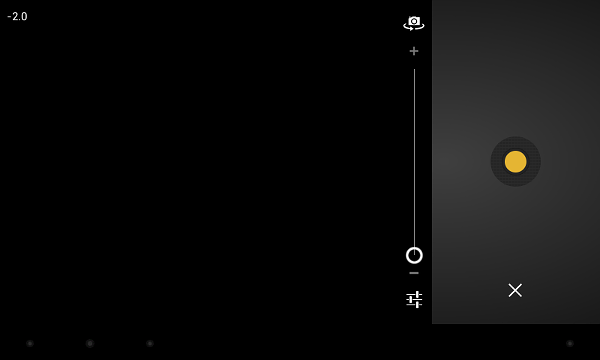
If have a different device you may have to click on an icon of a camera or something similar.
When you have taken a photo you may be presented with different options. For some devices You can click on the tick at the top to start obscuring the photo.
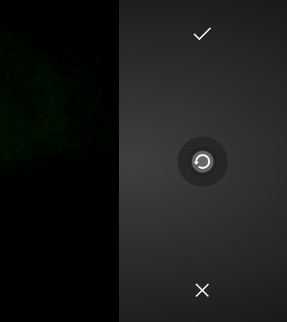
You can click on the middle icon to retry and take another photo. You can click on the X to return to ObscuraCam main main menu.
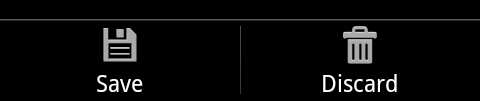
Other devices may give you an option to Save or Discard your photo.
The next stages of the process of obscuring your new photo is exactly the same as for working with existing photos, so read on to find out how to do it.
Obscuring an existing photo
Let's take the situation where you want to obscure a photo that you already have on your device. Start the app as before and select the option to Obscure Photo.
You should see a list of the different places on your device that have photos stored in them.
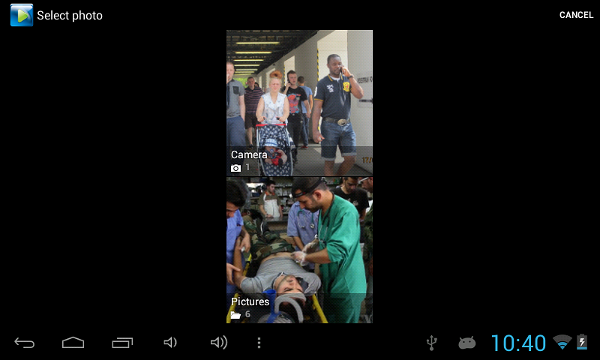
Browse until you see the photo you want to obscure. This may be a photo you have already taken on your device or another one that has been sent to you via email, web, twitter or other means.
Obscuring faces and other areas
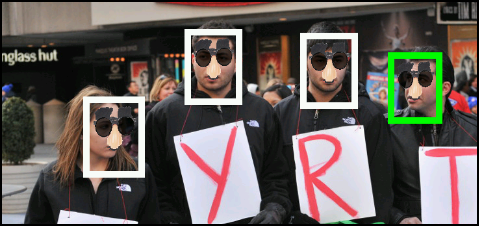
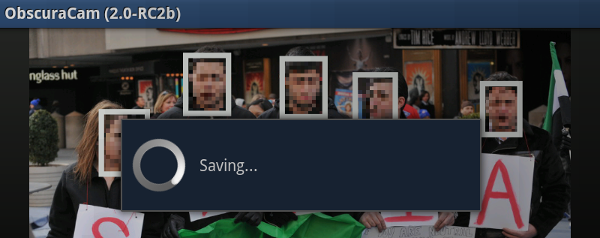
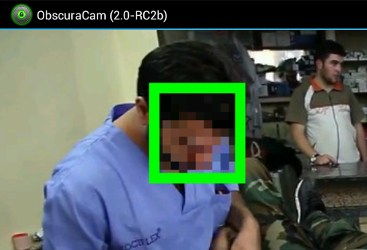
When you have selected your photo it will open up in ObscuraCam and immediately it will try to detect the faces in the photo.

Depending on the photo it will detect all or some of the faces.
In this case of this example, all faces were detected automatically and set to do the default pixelation to obscure facial details.
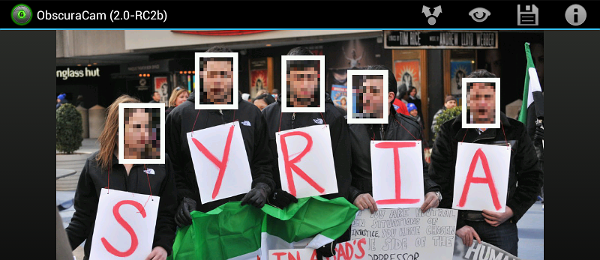
If we are happy with the areas tagged we can continue. If not, read on to see the section about adding more tags manually.
We can now save the obscured image by clicking on the icon of the disc.
You should see notification message saying you are saving your new image to the Gallery on your device.
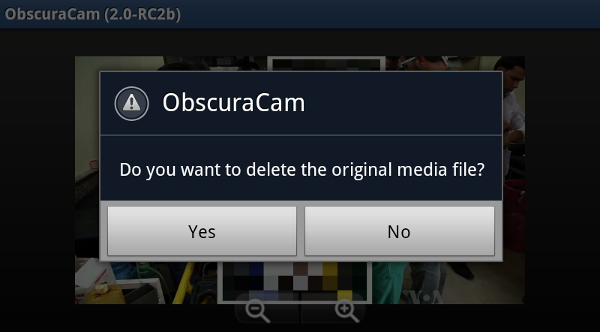
You should also get the option to delete the original file.
This is a chance to make a decision about if the original file is too risky to keep on your device.
Adding and configuring more Tags manually to the photo
We may want to pixelate another part of the photo or another faces that were missed by the automatic facial detection process. We can also delete tagged areas so that they are unpixelated or obscured in a different way.
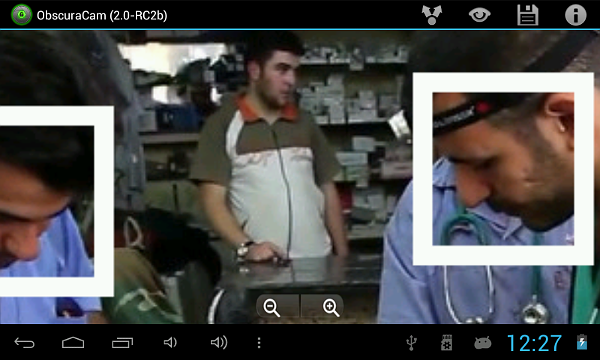
In the following photo only one of the faces has been recognised and the area selected it a bit big.

To alter the size of a tagged area you can touch and slide the corner of the selected area.
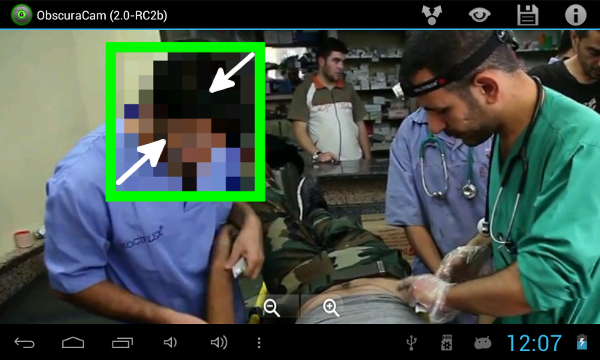
For example to make this area smaller touch and slide the corners together.
You can also touch the middle of the selected area and slide it to move it with our resizing it.
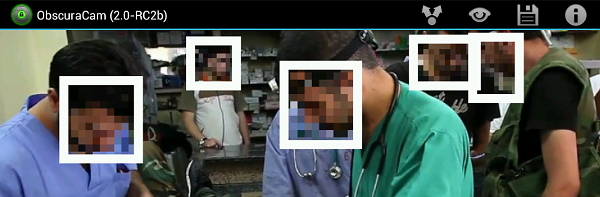
Creating a new tagged area
To create a new obscured area simply touch the area you want to obscure.
This will create quite a large tagged area which you can move or resize as you wish.
When you have selected an area if you touch it again you get the option to delete the area. This can be handy if you create new areas by mistake. To do this select the Clear Tag options

Zooming in with the zoom tool makes it easier to select some of the smaller faces in your photos. Zooming is also a good way of checking if faces that are small still need to be blurred.
You can repeat the process until all the faces you need are obscured and then Save your photo in the normal way.
If you want to check what the photo will look like before saving it, then you can touch the Preview icon. ![]()
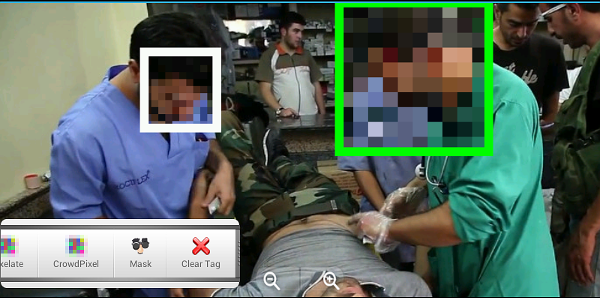
Other options for obscuring
When you touch each of the areas to obscure there are different options for obscuring.

The default option we have been using is Pixelate. You can see other options here. This includes Redact which replaces the tagged area with a black square.
CrowdPixel reverses the area to be pixelated and so it pixelates everything outside the box and keeps the area inside clearly visible.
Mask puts a mask over the top of faces. This may help to keep the photo light-hearted but may not be appropriate for serious subjects.