


TSS
TSS (Theora Streaming Studio) is an excellent encoder for sending Ogg Theora streams to an Icecast server. There is a home page for TSS that is worth reading for an overview of what it does and there are also installers available :
http://gollum.artefacte.org/tss/

TSS is a GUI (graphic user interface) encoder, which means you don't have to do anything tricky on the command line. TSS can send out one or two streams with different settings, from the same video source. The video source can be digital video (DV) or analog video via a video capture device such as a webcam, USB video-in or video card with video-in. Bear in mind that a fast computer with at least 2gig ram will be required to stream to 2 targets without frame drops or loss of audio synchronisation.
TSS can also display a preview of the outgoing stream, and can simultaneously archive the streams to disk (but that depends a little on how good your computer is).
TSS actually manages the command line softwares :
- dvgrab - grabs the video from a live video source such as a camera
- ffmpeg2theora - converts video files to Ogg Theora
- oggfwd - sends the video to a streaming server
One can always copy the command line being used by TSS, it will be printed out on the status window, the small black space we can see above under the Execute and Stop buttons. Simply scroll your mouse pointer and select the text. You could then run this piped commands directly from command line, saving some resources by avoiding launch of the graphical system.
TSS main developer is Lluis Gómez i Bigordà, the current release (February 2009) is 0.2. The project status is active (always good to know!).
Installing TSS
TSS can only be installed on GNU/Linux. We will look at installing TSS on Ubuntu.
First visit the TSS download page :
http://gollum.artefacte.org/tss/#download
Here you will see a section with two links. One link is marked 'Debian / Ubuntu package'. We wish to install this version. Click on this link using FireFox and you will see a window appear like this :

The option selected by default is what we want to use. If we open the installer with GDebi Package Installer, then the installer will download and install automatically...sounds easy! So lets do this. Simply click 'OK' and it will install.
Installing on 64 bit
When installing TSS you might see an error like this :

This means you are trying to install the software on a computer with a different 'architecture' than allowed by the software. Actually you can bypass this but you have to do it on the command line. First, instead of using GDebi you need to download the sources (.tar.gz file). Then from the same directory as where the installer is located you need to type this on the command line :
sudo apt-get install dvgrab ffmpeg ffmpeg2theora libtheora-bin oggfwd libvte-dev
The above command might take a while as there is a lot to download and install. When the process is complete follow this with these commands :
tar zxvf tss-0.2.tar.gz
cd tss-0.2
./autogen.sh
Note : the name of the file to be installed will probably be different from that listed above.
Next execute the following commands :
make
sudo make install
Now try typing 'TSS' on the command line, if it doesn't work then try this :
sudo cp src/tss /usr/bin/
The try starting TSS again from the command line :

Using TSS
There are two main panels in TSS that you have to verify have the right settings in order to send a stream : the source and target tabs :
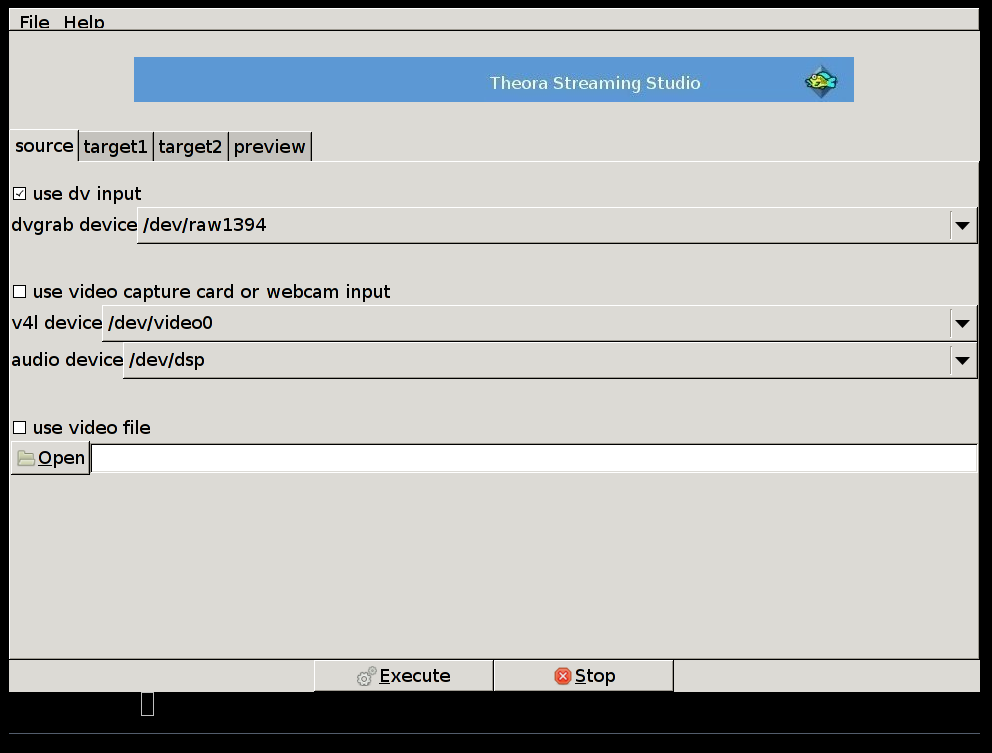
On the source tab one can choose the type of video input. When operating on a minimal setup there is a option to use a webcam via video for GNU/Linux (v4l). You can also choose a DV input - this is useful for streaming live video from a hand held video camera.
TSS also offers the possibility to stream an existing (archived) video file from your computer to an Icecast server.
The second tab is called target1, here we will define the stream settings for our main stream. Below is an example :
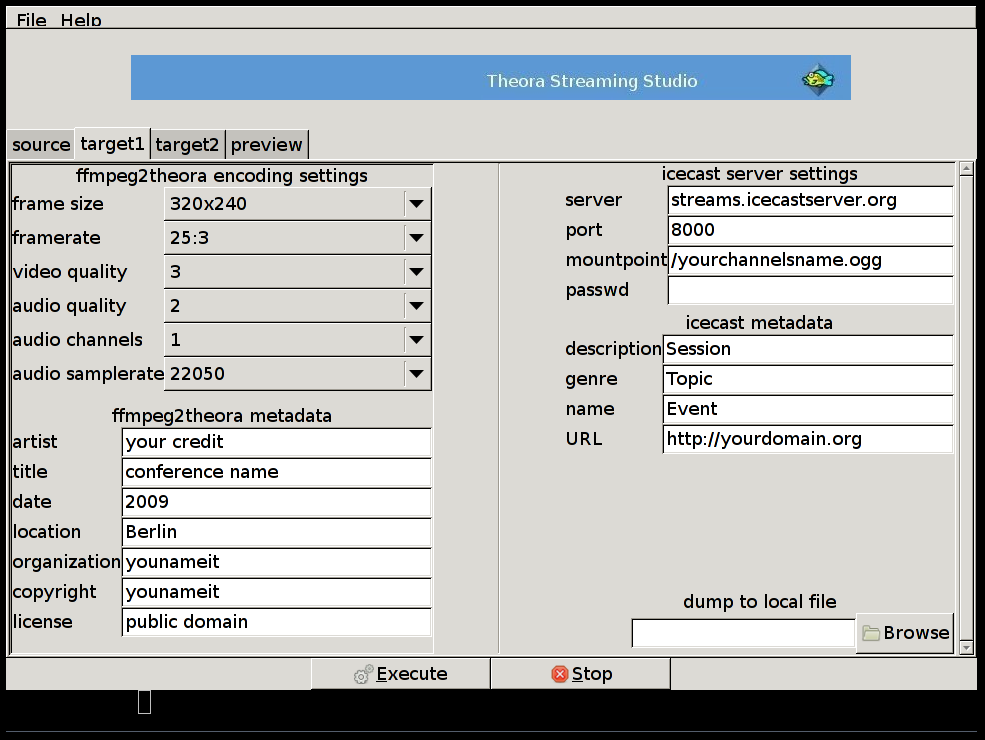
All fields in the ffmpeg2theroa encoding settings section must be completed.
It is important we keep in mind that any information we enter here will have a direct influence on the final output bitrate of our stream. You cannot simply nominate an outgoing bitrate, rather the outgoing bitrate is based upon the choices you make about frame size, audio quality etc.
Also, remember that the higher this bitrate is - the more bandwidth will be required to send it to the Icecast server, and the higher the bitrate the higher the bandwidth requirements of the audience connecting to your stream. So if some of our viewers are in Colombia where the average network connection is still around the 128kbps (kb/s or kbit/s is a unit of data transfer rate equal to 1,000 bits per second). This will mean that even though we have broadband connection sufficient to allow us to send a stream at a high resolution and high quality compression rate, we need to be careful to send a stream at a bitrate less than 128kpbs, otherwise few people in Colombia would be able to see it.
The following categories relate to the options in the TSS encoding setting for both target1 and target2 :
Frame size: here we define the dimensions in pixels of the video stream. 320 by 240 has become a standard. For low bandwidth settings one might opt for 240 by 180.
Frame rate: This setting defines the number of frames per second we want to transmit. Different events will require different frame rates. In the case of a conference, where the subjects don't move or change position too much, a 12fps (fps = frames per second) setting could be appropriate. In the example above we decided to sacrifice on the frame rate in favor for a bigger frame size. We selected 25:3 that will be around 8fps.
Video Quality: This setting takes values in the range of 0 to 10. The default encoding quality for video of ffmpeg2theora is 5, one should use higher values for better quality.
Audio Quality: This setting takes values in the range of -2 to 10. The encoding quality for audio defaults to: 1. Use higher values for better quality.
Audio Channels: Sets the number of output audio channels. The choices are 0 (no sound), 1 (mono) or 2 (stereo).
Audio samplerate: Expressed in Hz (Hertz) this box sets the output sample rate of the audio.
Below the boxes dealing with the technical specifications of the outgoing stream is where you enter information that you want the audience to know :

The information in the ffmpeg2theora metadata boxes is potentially available to your audience. Whether they can see the information depends on how they are viewing the stream (what player/browser) and if they know how to access this information. You can enter any information here, it doesn't matter - ignore the categories (location, date etc) if you want to.
The icecast server settings and icecast metadata entry boxes are next.

In the icecast server settings we have to define the address (URL) of the streaming server, the port this server is using (usually 8000), the name of our mountpoint (channel), and the password. If you lack access to an icecast server there are few free projects out there dedicated to assisting people to stream using free software, check on estudiolivre.org or GISS.tv to name a few.
The icecast metadata settings is simply where you put information about your stream that you want the audience to know. This information will be displayed on the servers webpage (each Icecast server installation has its own webpage). Although they have specific titles you can put any information in here, it doesn't matter.
The last tab has the title preview.
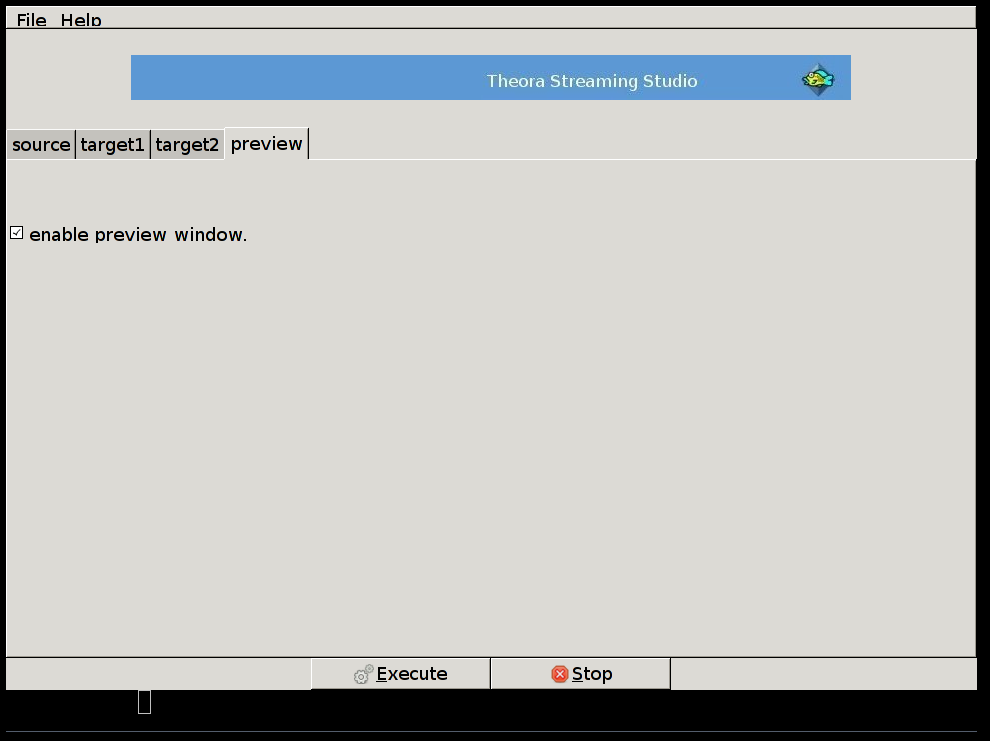
If you check enable preview window you will see a preview of the live stream as you encode it. This video is not the same as the video coming from the Icecast Server, so it always pays to monitor both the preview and the stream coming from the server (monitor the incoming stream on another computer).
If you wish to send one stream you need only pay attention to the settings in the Source and target1 tabs. If you wish to send two streams you have to pay attention to the settings in target2 as well.
Once you have specified all the required information for each of the outgoing streams and have connected the correct video source (or you have chosen a working video file to stream) then you just press 'Execute' and the streaming should begin!