


Hands-on
In this section we are going to take you through a short guided tour of Scribus. In seven steps you learn how to create a tri-fold brochure.
Make a draft sketch of your document
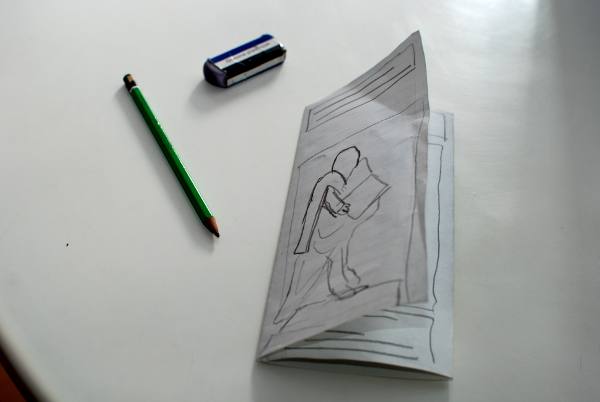
The first step takes place away from your computer – in a sense, since we are going to end up most often with a result on paper, we will begin by working with paper. To sketch your brochure, begin with a sheet of white office paper (A4 or US Letter), and fold it in thirds, so that it folds together as shown. Although in your actual brochure you might wish the inside flap to be slightly more narrow than the left front flap, so that it completely covers the inside flap when folded together, for this demonstration we are not going to bother with this precise detail.
Sketch some picture on the front flap, then check the result.
Some comments:
- At this early stage, feel free to make various drafts of your work, so that you can get the appearance of the brochure as you would like.
- Work with a pencil, paper, and eraser – this is a sketch, not a piece of art. At this point you're mainly interesting in working quickly.
- If you don't like what you've done at all, throw it away and start over.
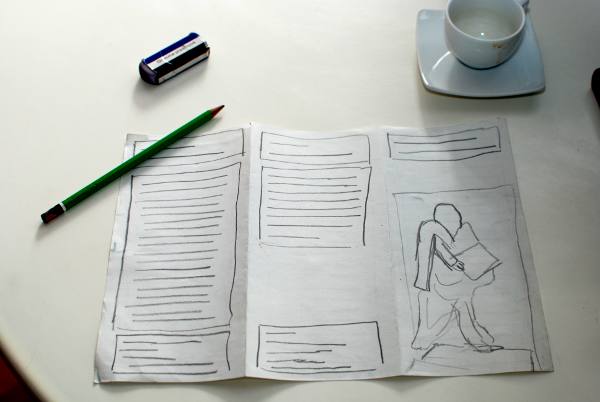
Once you are satisfied with how the brochure works as a physical, folding object, you can begin to consider how you want to distribute the content on the various spaces on the flaps, front and back.
In general, you will probably want to use the three internal spaces for your primary content, so that the layout of these will be a sequential succession, left to right.
For the three other pages/flaps (those on the outside of the folded brochure), each has its own considerations regarding its content:
- The front flap (which when unfolded will be the right-most panel of the page) will contain a large image, a title, and very brief indication of the brochure's content.
- The middle panel will be the back of the folded brochure – we will use this for contact information.
- The left panel is the one which is first seen as the brochure is opened – it will contain further information on the content, perhaps some sort of listing of the contents.
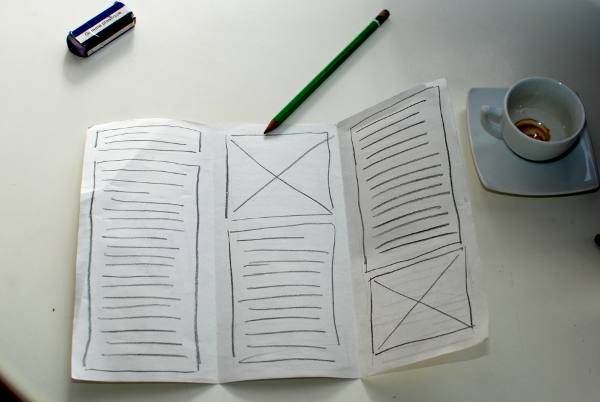
In the images here below you can see how we have demarcated boxes or frames with some indication of how text and images are arranged in the brochure panels:
- You can see that we have simply drawn lines to indicate the text in the frames. You might alternatively write some notes which say something about the content of various frames.
- Image frames are noted by drawing a cross (so that we know this is an image frame and not text), or you might place a simple sketch to denote a particular content.
For this guided tour of Scribus we are proposing to create a brochure about Johannes Gutenberg, in relationship to his inventions regarding the printing press. We will be using images and text from the Wikipedia webpage on Gutenberg, which may be used under the Creative Commons licensing of their site.
Create a new document
When you start up Scribus, it presents you with a dialog for creating a new document. In case you may have closed this dialog, you can bring it up again with the menu File > New.

The document you are going to create will have the following characteristics:
- The type of display is Single Page.
- The size is A4.
- Orientation is Landscape.
- Make sure the units are millimeters, since the default may be points.
- Create 2 pages, for each side of our A4 paper.
- Choose margins of 1cm (10mm) to make sure we remain within the boundaries of where our printer can physically print on the paper.
Other parameters should remain at default settings.
Click on OK to finally create this document.
Here you see, in a scaled down view, how your document appears in the main window:

Now is the time to save your work. Create a directory Scribus_Gutenberg inside your Documents directory, then give your file a suitable name.
Define some guides
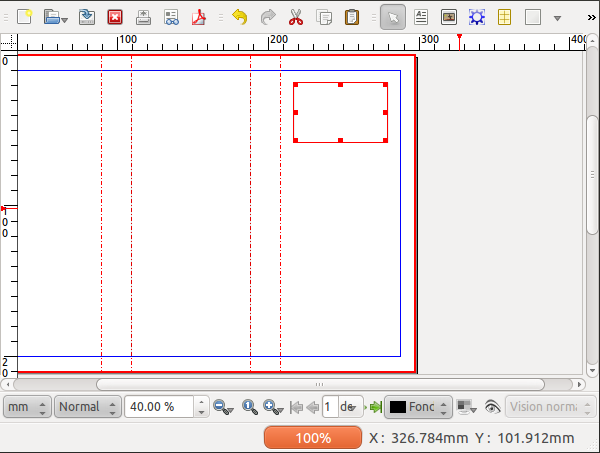
You will be using guides to assist with the alignment of the content according to the folds of your brochure. In the menu, select Page > Manage Guides.

Using the middle tab (Column/Row) you can create two vertical guides, with a space between them (Gap) of 2 cm. This value is double that of the margins, so that the content will be balanced in the various flaps.
Further, you want to define these guides with respect to the margins, not the page.
Finally, click Apply to All Pages and close the Guide Manager.

If you do not see the guides, go to the menu and select View > Show Guides.
Write some text
In Scribus, you don't write directly on the page – first you create frames which will then contain the text. In general, most graphical elements are contained in frames. With these we can freely move all of our various elements around the pages.
Go to the first page of your document. If necessary, use the slider at the bottom to position the cover flap in your workspace. You can also zoom your view by holding down Ctrl and running the mousewheel up and down while the mouse arrow is over the zoom indicator – quite easily done with this tool!
You can also move your page up and down, left and right, by holding down the middle button (or wheel), then dragging the mouse in the appropriate direction.
Activate the text frame tool by clicking Insert > Insert Text Frame from the menu, or from the icon (which is the one just to the right of the white arrow icon on the toolbar, then make your text frame on the page with a click-drag-release action.
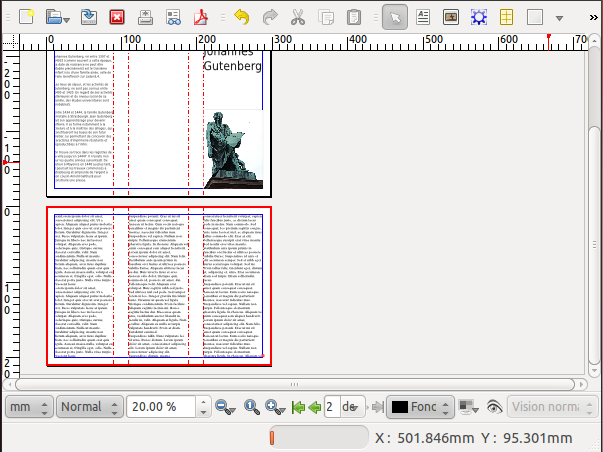
You can resize your frame by click-dragging the small red square at the lower right corner – resize it so that it can contain two lines of text: Johannes Gutenberg.
Notice that after you have created your frame, Scribus automatically switches to Item Selection mode – the icon with the white arrow is selected in the toolbar – which allows you to select and move objects. If you wish to switch from some other tool in the toolbar, either click the Item Selection icon or press Esc.
Double-click inside the frame, and the various adjustment squares disappear, so that now you can type in Gutenberg's name (you are now in Edit Contents mode).
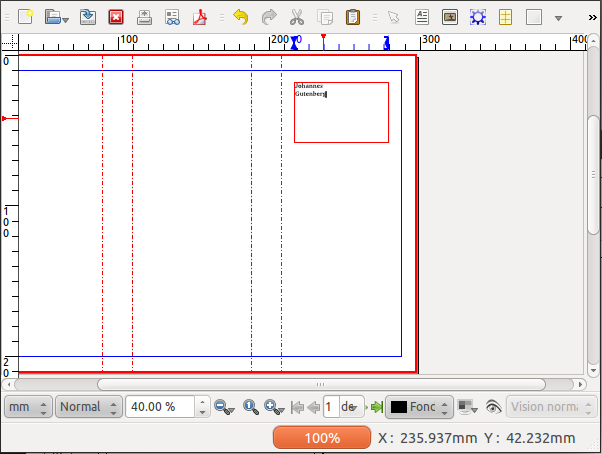
But your text is quite small isn't it? To change the size select all the text (if you are still in Edit Contents mode, from the menu select Edit > Select All), open the Properties palette (Window > Properties), select the Text tab, so that you can try various fonts and font characteristics, including the size of the characters (glyphs).
If the lines are too close together, adjust the linespacing. In general, a minimum spacing of 20% greater than font size is advisable.
You can exit Edit Contents mode by clicking on the canvas outside the frame or by pressing Esc, and of course you can go back to Edit Contents by double-clicking inside the frame.
Add an Image
The next step will be to place an image of Gutenberg's statue on the cover. Download this image from Wikimedia commons:
http://commons.wikimedia.org/wiki/File:Statue_de_Gutenberg_à_Strasbourg.jpg
Make a directory images inside your directory Scribus_Gutenberg and download the largest image (full resolution) into the images directory.
Activate the image frame tool from the menu (Insert > Insert Image Frame) or click the Insert Image Frame icon from the toolbar, and then with a click-drag motion create an image frame on the cover of our brochure.
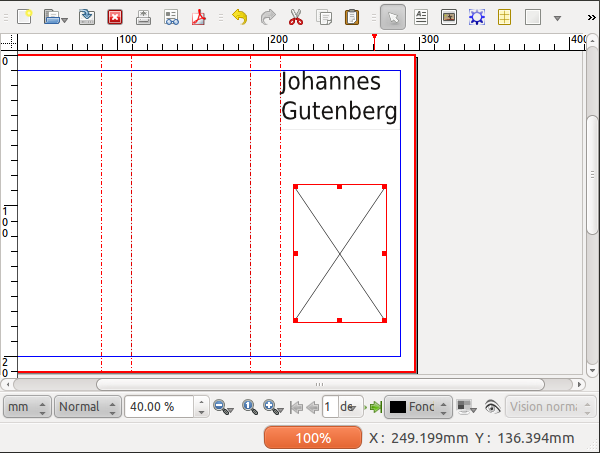
Make sure you have selected the image frame, then load the photo of the statue (which you should find in your directory Images inside your working directory for this project) by using File > Import > Get Image.
Most likely, your image appears all white – don't panic, this is the background of this image, and you're only seeing a small part of it! Bring up the Properties palette (Windows > Properties), select the Image tab, and select the options Scale To Frame Size and Proportional.
By default, Scribus will import images according to their resolution as noted in the file. Since there isn't yet any information about the resolution you would like to use, Scribus simply loads the image at its maximum size.
A quicker way to carry out this operation is to right-click on the image frame and select Adjust Image to Frame from the context menu.
Next, adjust the image frame by right-clicking, then choosing Adjust Frame to Image, then move the frame so that it lines up with the left edge of the leaf:
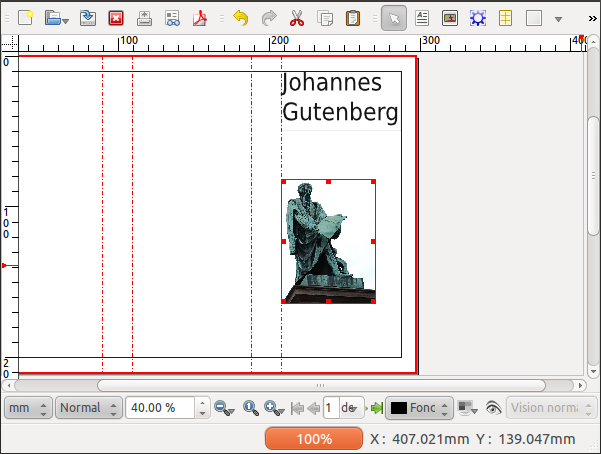
With a click-drag operation on the small red square in the right lower corner of the frame, you can now resize the frame so that it fills the column created by the guide to the left and margin to the right.
Import some text
As you will learn in this manual, Scribus is often not the best tool for composing text. In addition, much if not most of the time, you may be importing text written by others, or reusing text you have written for some other context.
To simulate this situation, we will use a browser to go to the Wikipedia page about Gutenberg – http://en.wikipedia.org/wiki/Johannes_Gutenberg – and copy the section Early Years, then open a text editor, create a new file, and paste the text from Wikipedia. Save the file in a new directory Text inside your working directory.
Create a text frame in the Inside flap, being sure the fill the space to the margins and to the guide. Select the frame, then from the menu, File > Import > Get Text to import the text you just saved in your file.
Use the instructions in the above section Write some text to adjust the size of the title in this text frame.
Linking text frames
On the second page of your document, you are going to add some text which links across the three panels.
Now let's apply a little trick – after you activate the text frame tool (Insert > Insert Text Frame), hold down Shift while you click inside the space for Content 1 – what you have done is to create a text frame which fills the space delimited by the margins and the guide. Repeat this for the other two panels on the second page. If you have trouble with this, you can simply create a text frame and enlarge to the desired space – in this case, setting Page > Snap to Guides can assist you in filling the space to its margins.
Now you have set up the layout, but you have no text. For our example we will use Sample Text – select the frame in the first panel, then Insert > Sample Text, and choose Standard Lorem Ispum.
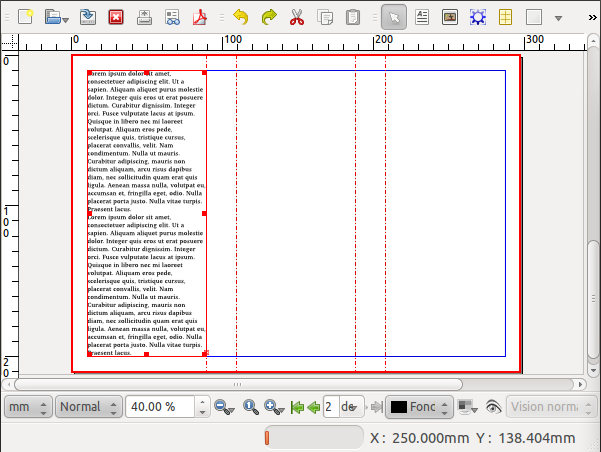
If you look in the lower right hand corner of the text frame you see a small red box with a cross, which indicates that the actual text is overflowing the frame. Make sure the first frame is selected, then click Item > Link Text Frames, then click the second frame. Now select the second frame, click Item > Link Text Frames, then click the third frame.
Don't forget to save your work!
The important toolbar elements
Now that you've finished this little project, let's go over the main toolbar icons which you are likely to use in the composition of your documents.
- Selection tool
- Insert Text Frame
- Insert Image Frame
- Insert Render Frame
- Insert Table
- Insert Shape
- Insert Polygon
- Insert Line
- Insert Bezier Curve
- Insert Freehand Line
- Rotate Item
- Zoom
- Edit Contents Mode
- Story Editor
- Link Text Frames
- Unlink Text Frames
- Measurement
- Copy Properties
- Color Picker

Congratulations!
You have created your first layout. Certainly not perfect, but a good start!
When you have actually finished a layout, you would be exporting to PDF for printing or distribution, but at this stage this is a bit complex. As you continue through the manual, you will learn this and other various tasks to use Scribus to its full capabilities.