


Installation
We tried to make ChucK as easy as possible to build (if desired), install, and re-use. All sources files - headers source for compiler, vm, and audio engine - are in the same directory. Platforms differences are abstracted to the lowest level (in part thanks to Gary Scavone). None of the compiler/vm has any OS-depedent code.
There are also pre-compiled executables available for OS X and Windows.
The classic ’chuck’ runs as a command line program. There are GUI-based integrated development and performance environments as well that can be used as standalone chuck virtual machines, or in conjunction with the command version of ’chuck’. GUI-based environments include the miniAudicle (http://audicle.cs.princeton.edu/mini). This section deals mainly with the classic, command-line version of chuck.
Binary Installation
The binary distributions include a directory called bin/ that contains the precompiled binary of ChucK for your operating system. The binary distribution is a great way to dive into ChucK.
OSX
- The terminal is located in the Utilities/ folder in the Applications/ folder of your hard drive. Open terminal (create a shortcut to it in the dock if you want, since we will be using it a lot with the command-line chuck). In the terminal go to the bin/ directory (replace chuck-x.x.x.x-exe with the actual directory name):
%>cd chuck-x.x.x.x-exe/bin
- Install it using the following command.
%>sudo cp chuck /usr/bin/
(enter password when prompted)%>sudo chmod 755 /usr/bin/chuck
Now you should be able to run ’chuck’ from any directory.
Test to make sure it is was installed properly.%>chuck
You should see the following message (which is the correct behavior):[chuck]: no input files... (try –help)
Windows
- Place chuck.exe (found in the 'bin' folder) into c:windowssystem32
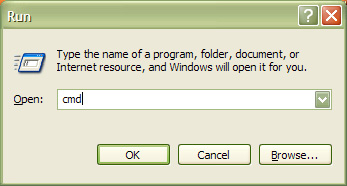
- Open a command window found in start - run
- Type cmd and press return
- Type chuck and press return, you should see:
chuck [chuck]: no input files... (try --help)
Source Installation
To build chuck from the source (Windows users: it’s possible to build ChucK from both Visual
C++ 6.0 and from cygwin - this section describes the cygwin build):
- Go to the src/ directory (replace chuck-x.x.x.x with the actual directory name):
%>cd chuck-x.x.x.x/src/
- If you type 'make' here, you should get the following message: %>make [chuck] : please use one of the following configurations: make osx, make osx-ub, make win32, make linux-oss, make linux-alsa, make linux-jack Now, type the command corresponding to your platform... for example, for MacOS X (universal binary):
%>make osx-ub
for example, for MacOS X (current):%>make osx
for example, for Windows (under cygwin):%>make win32
- If you would like to install chuck (cp into /usr/bin by default). If you don't like the destination, edit the makefile under `install', or skip this step altogether. (we recommend putting it somewhere in your path, it makes on-the-fly programming easier)
# (optional: edit the makefile first)
%>make install
You may need to have administrator privileges in order to install ChucK. If you have admin access then you can use the sudo command to install.%>sudo make install
- If you haven't gotten any egregious error messages up to this point, then you should be done! There should be a `chuck' executable in the current directory. For a quick sanity check, execute the following (use `./chuck' if chuck is not in your path), and see if you get the same output:
%>chuck [chuck]: no input files...
(if you do get error messages during compilation, or you run into some other problem - please let us know and we will do our best to provide support)
You are ready to ChucK. If this is your first time programming in ChucK, you may want to look at the documentation, or take the ChucK Tutorial (http://chuck.cs.princeton.edu/doc). Thank you very much. Go forth and ChucK - email us for support or to make a suggestion or to call us idiots.
Ge + Perry
Linux building and dependencies
Compiling ChucK & miniAudicle on Fedora 10, Planet CCRMA
(as root)
yum install bison flex libsndfile-devel gcc gcc-c++
for alsa:
yum install alsa-lib-devel
for jack:
yum install jack-audio-connection-kit-devel
then in src directory, type
make linux-alsa or make linux-jack
for miniAudicle, add this:
yum install wxGTK-devel
then
make linux-alsa or make linux-jack
the miniAudicle executable file will be in wxw directory, which you may copy to /usr/bin
Compiling ChucK & miniAudicle on Ubuntu 9.10
Get the following packages from Syntaptic package manager;
- build-essential
- bison
- flex
- libsndfile-dev
- libasound-dev (if you're compiling for ALSA)
- libjack-dev (if you're compiling for JACK)
For miniAudicle, you'll also need
- libwxgtk2.8-dev
To compile ChucK; From the source code's src folder, use
make linux-alsa
if you need alsa or
make linux-jack
if you need a jack version.
to install;
sudo make install
or manually copy to /usr/bin
To compile miniAudicle From the source code folder, use;
make linux-alsa
or
make linux-jack
The resulting executable will be miniAudicle in the wxw folder. It may be moved to /usr/bin for running it from anywhere easily. Instructions for building on Linux adapted from a forum post by Kijjaz.